
How to Attach a Form When You Create a Service or Rental Booking
You can now attach a form to a service or rental booking while you create it inside the app, not just when a customer books through your booking page. Fill the form out on the customer's behalf, and the intake details are saved with the booking.
Before you start: Services and Rentals have to be turned on for your sub-account at the agency level before you can use this, and you can't turn them on yourself. If you don't see them, reach out to our support team through live chat or at support@fgfunnels.com and ask to have them enabled.
In this article
What You Can Do
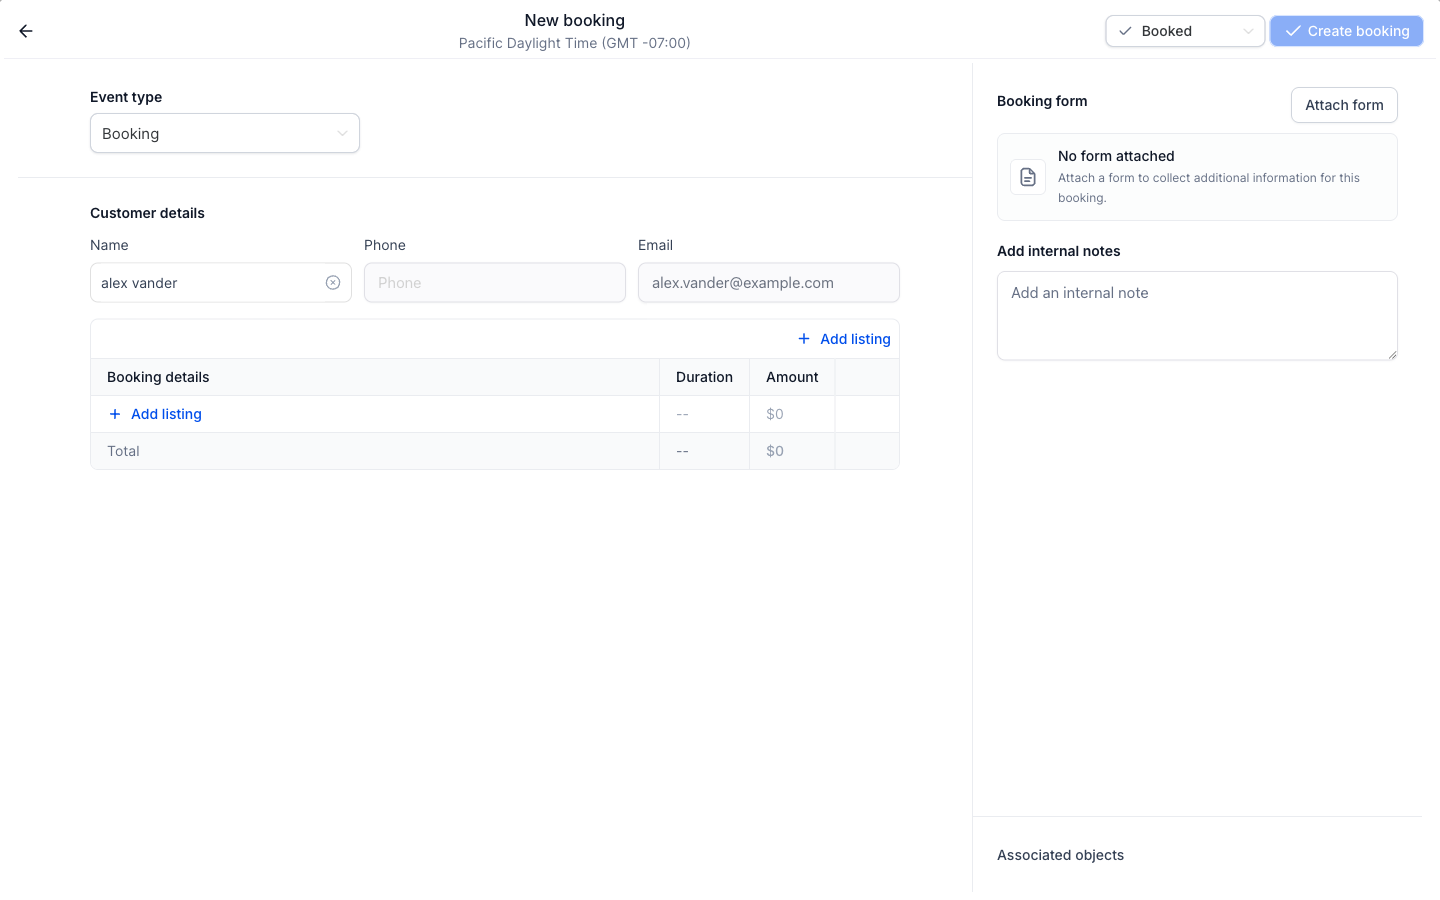
When you create a service or rental booking on the New booking screen, it now includes a Booking form section where you can:
- Attach a form right in the booking flow. Click Attach form and the form opens inside the booking flow. Attaching a form is optional.
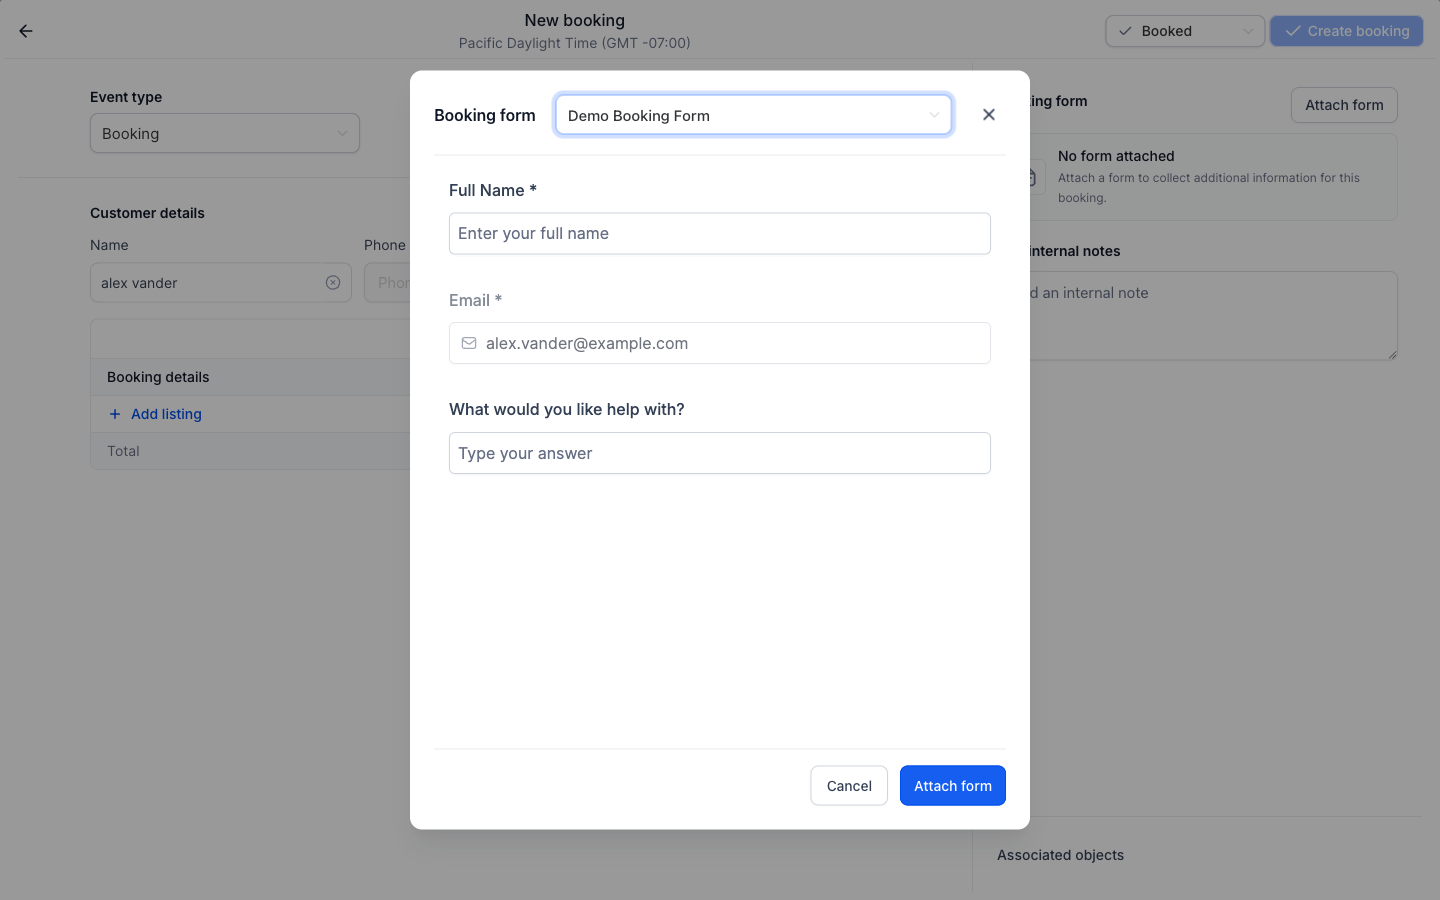
- Start with the right form. The form you configured is preselected. If you need a different one, switch to another available form from the dropdown.
- Skip retyping contact details. First name, last name, email and phone are filled in from the contact you selected.
- See only what your team needs. CAPTCHA, product selling and payment elements are hidden when a form is filled out on the New booking screen.
How to Attach a Form to a Booking
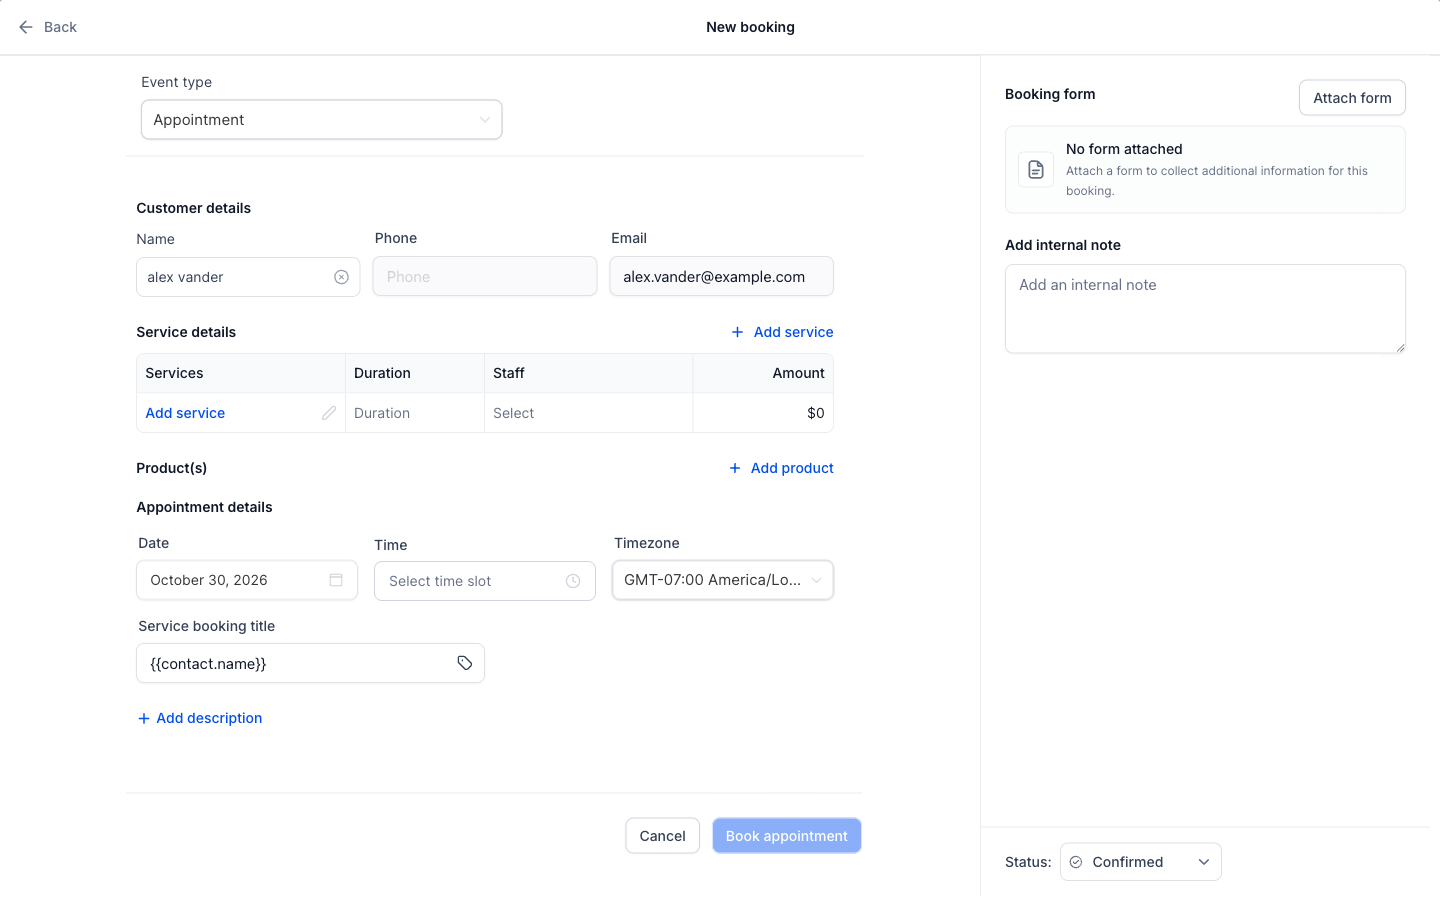
1. Start a service or rental booking and select the contact
Go to Calendars, open Calendar view, and use the dropdown at the top to switch from Meetings to Services or Rentals. Click New, then choose the contact the booking is for. The Attach form button stays unavailable until you've selected a contact.
2. Click Attach form
In the Booking form section, click Attach form. The form opens in a Booking form window within the booking flow. Your configured form is already selected, and you can pick a different one from the dropdown at the top if needed.
3. Complete the form and create the booking
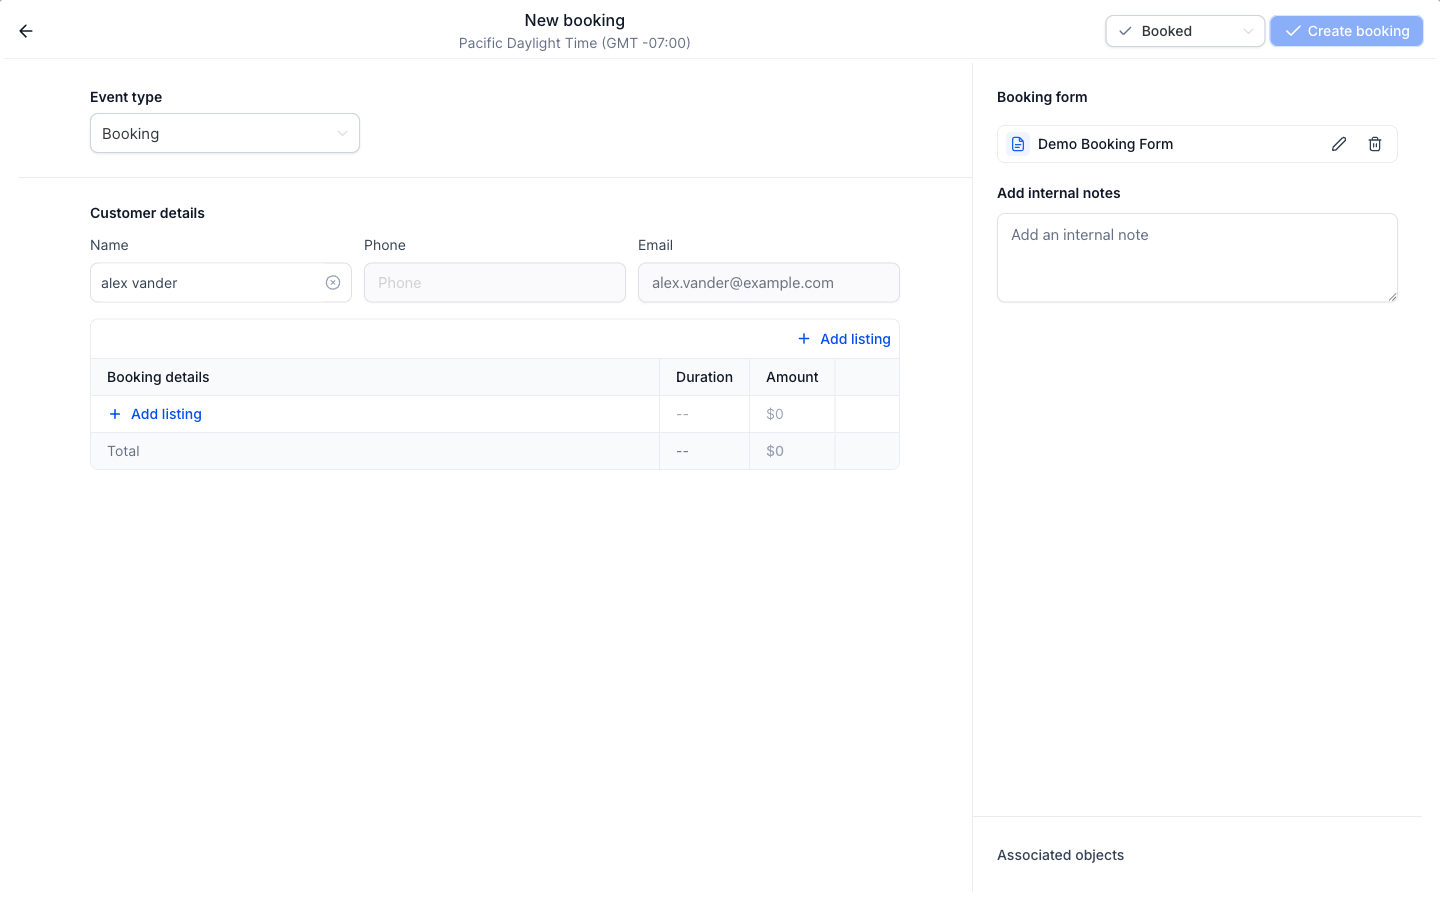
Fill out the form on the customer's behalf and click Attach form, then create the booking. Required fields are checked when you click Attach form, so fix anything flagged (like an invalid phone number) before the form will attach.
4. View the submitted form any time
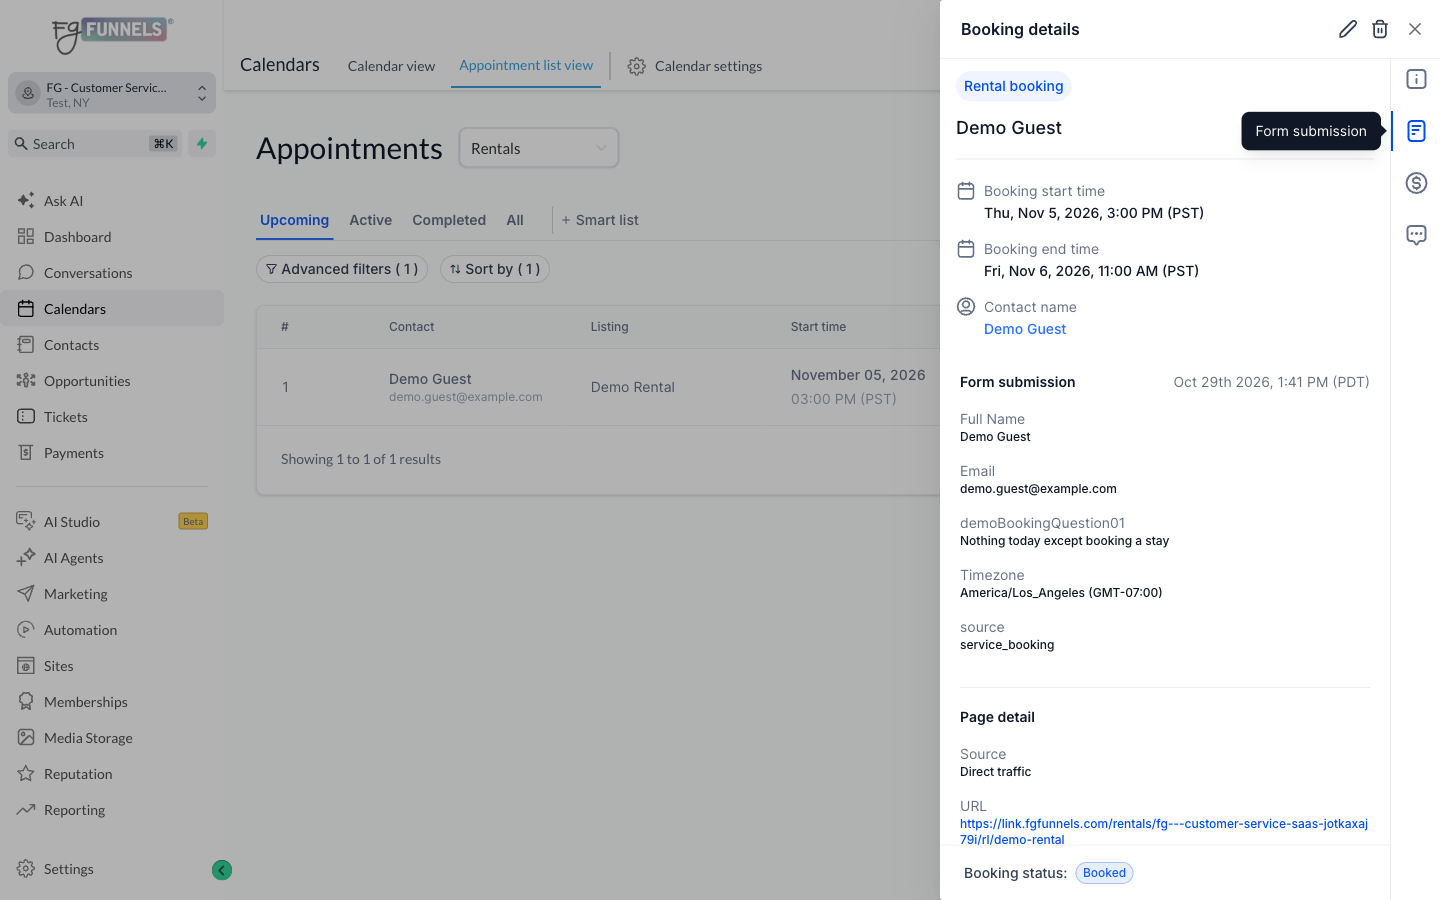
Open the booking's details whenever you need to see what was submitted. For example, go to Calendars, open Appointment list view, click the eye icon on the booking, and open the Form submission tab.
What to Know About Attached Forms
- Attach the form while you create the booking. You can only attach a form while the booking is being created. It can't be added or edited afterward, so complete it before you create the booking.
- CAPTCHA, product selling and payment elements won't appear. They are hidden when the form is filled out on the New booking screen.
- Contact details come from the selected contact. Choose the right contact first so the prefilled name, email and phone are correct.
Why Attach a Form to a Booking
Bookings you create by hand capture the same intake details as bookings made online. Important details are collected up front and logged with the booking, and prefilled contact details save time and help prevent mismatches.