
Subscription Cancellation Workflow Automation for Community Groups and Courses
Note: Your screen may look different from this article if your account has the new FG Funnels menu design turned on. Learn why and how to switch back.
This article shows how to handle subscription cancellations for customers who have access to your courses and/or community groups. You'll learn:
- How the built-in Billing and Subscriptions section works in the client portal, and how to turn it off.
- Two other ways to let customers cancel at the end of their billing cycle instead of right away.
- How to build a workflow that automatically removes course or community group access when someone cancels.
In this article
The Built-In Client Portal Cancellation
The client portal includes a built-in Billing and Subscriptions section where customers can cancel their own subscriptions. See How a Customer Can Cancel Their Subscription in the Client Portal.
⚠️ Important: This cancels the subscription immediately, even if the customer has time left in their current billing cycle. If the subscription is tied to course or community group access, the customer loses access right away.
The video above shows where customers find Billing and Subscriptions, and how to turn it off in your client portal.
Alternative Cancellation Methods
If you'd rather let customers cancel at the end of their current billing cycle, use one of these two options.
Option A: Cancellation form
Create a cancellation form that sends you an internal notification when it's submitted. That's your reminder to log in to Stripe and set the customer's subscription to cancel at the end of their billing cycle.
- Create a form under Sites > Forms. See How to Create a Form.
- Turn on internal notifications for the form so you're alerted when someone submits it. See How to Set Up Internal Notifications in Workflows.
- Link to the form in one of these places:
- Inside your course, as a dedicated "Manage Subscription" lesson.
- Inside your community group, in the links area on the right-side menu, just below the thumbnail image.
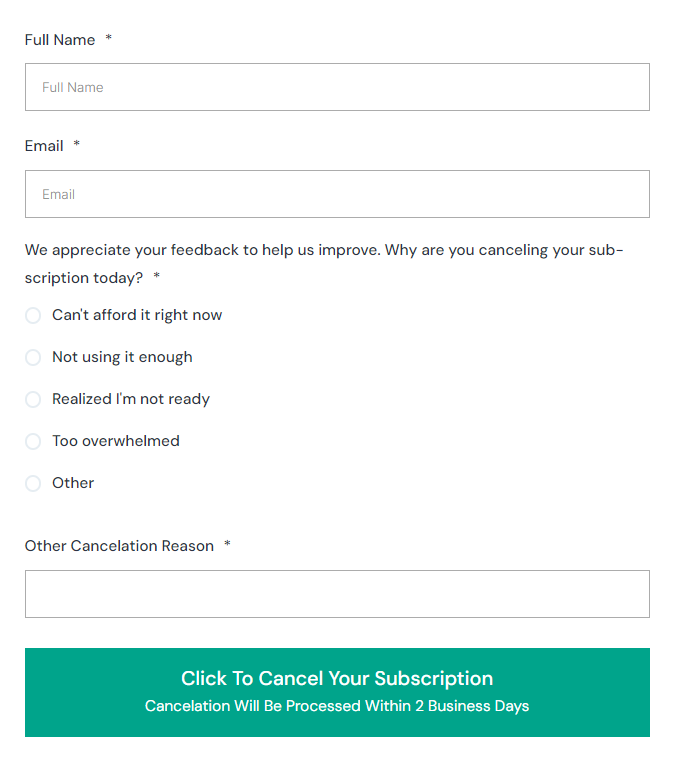
In this example, Cancellation Reason uses radio buttons and the last field is a single-line text field. You could use a multi-line field instead to give customers more room to type.
Option B: Stripe Customer Portal
If you'd like customers to manage cancellations themselves, turn on Stripe's Customer Portal. Customers can:
- View their invoices.
- Update their payment method.
- Cancel their subscription at the end of their billing cycle.
📖 Stripe's Customer Portal documentation
Where to link it:
- Inside your course, as a dedicated category and lesson (for example, "Manage My Subscription").
- Inside your community group, in the right-side menu just below the thumbnail image.
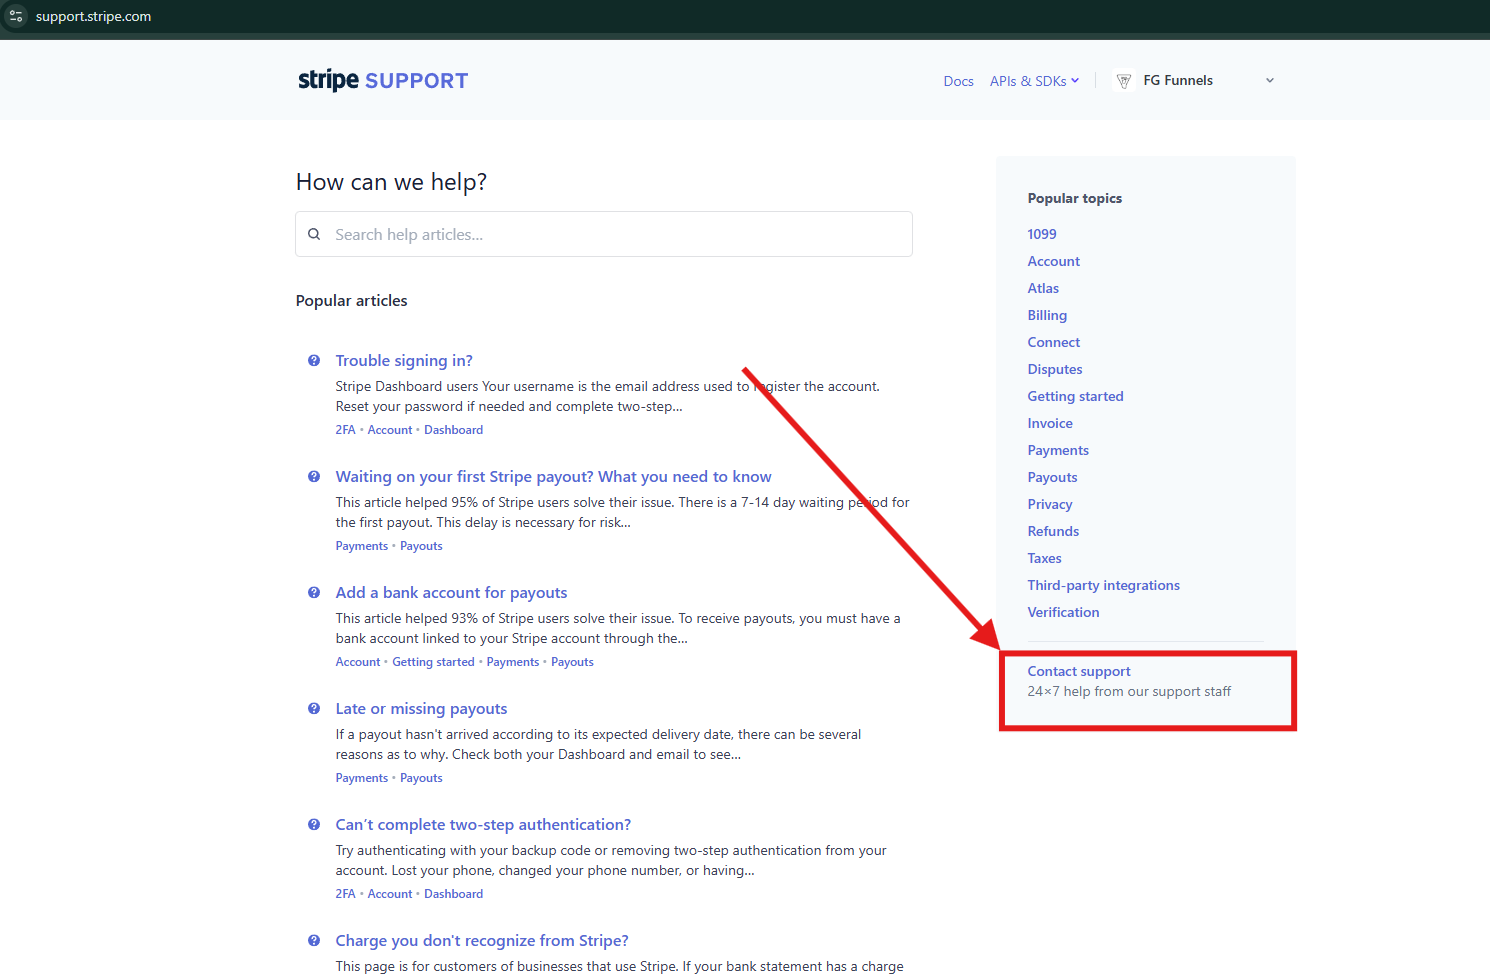
💡 Tip: Contact Stripe Support to confirm whether the Customer Portal has any extra costs, since Stripe's policies can change. Log in to your Stripe account first to reach their chat support.
Building the Cancellation Workflow
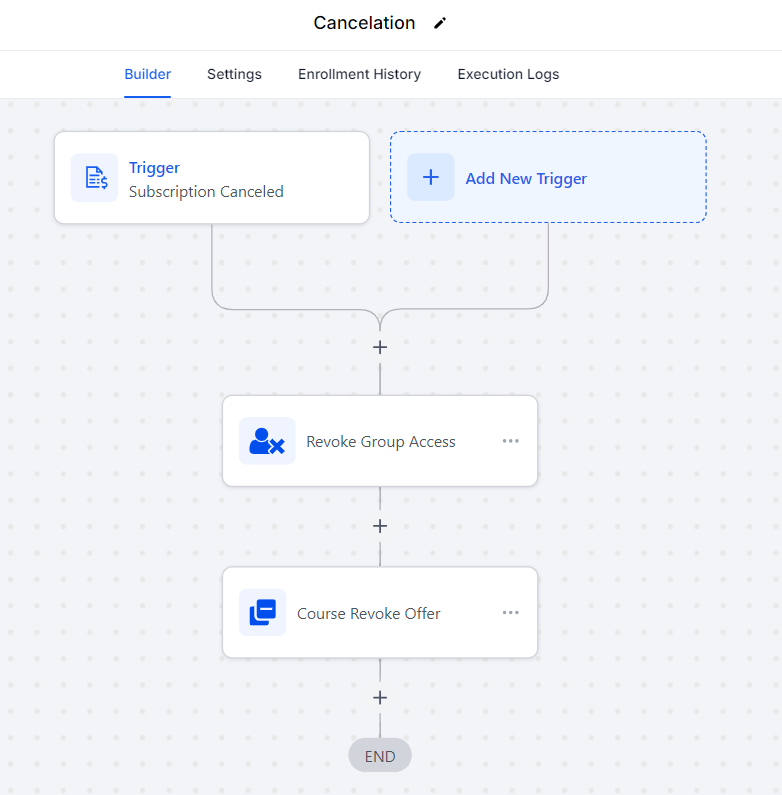
When a customer cancels, whether through the Stripe Customer Portal or after you've set their subscription to cancel from a form submission, a workflow can automatically remove their access to courses and/or community groups.
1. Create a new workflow
Create a new workflow.
2. Add a Subscription trigger
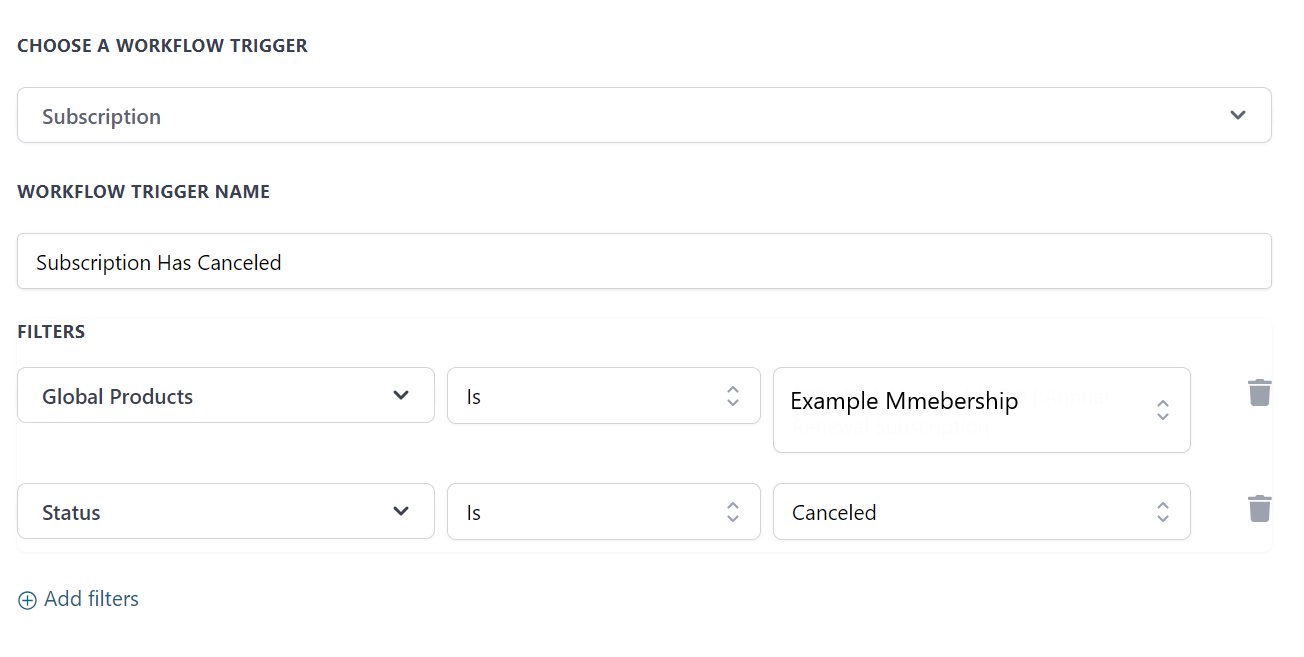
Add a Subscription workflow trigger.
⚠️ Important: The Subscription trigger only works with subscriptions created through Stripe, Authorize.net, and NMI. It doesn't work with PayPal at this time.
3. Filter for canceled subscriptions
Set the trigger to filter for subscriptions with a Canceled status. You can also add a product filter (as shown in the example) so the workflow only runs for a specific membership.
4. Add the revoke actions
Add these action steps:
- Course Revoke Offer: removes access to the course.
- Revoke Group Access: removes access to the community group.
Hiding PayPal at Checkout
The cancellation workflow doesn't support PayPal subscriptions, so hide the PayPal option at checkout to make sure every subscription goes through a supported payment gateway.
Add this CSS to hide the PayPal button:
/* Hide PayPal button */
.order-form-v2 .paypal-content {
  display: none !important;
}