
How Can My Customers Use the Client Portal?
The Client Portal is one place where your members go for everything you offer them: courses, communities, their finances, and affiliate stats. They sign in once and get to all of it from a single Dashboard.
Still on the classic look? See Moving to the New Client Portal Experience.
In this article
Quick Start for Your Members
Copy this section and send it to your members.
Welcome! Here's how to get into your portal:
- Open the portal link from your welcome email, or the link your coach or business shared with you.
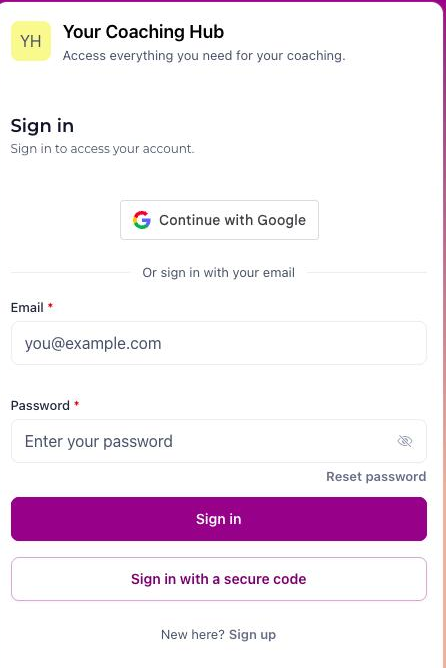
- Sign in with your email and password, or click Continue with Google. If you don't have an account yet, click Sign up under New here?, enter your full name, email address, and password, then enter the confirmation code we email you. The code expires after 15 minutes, so check your spam or junk folder if you don't see it.
- If you've forgotten your password, click Sign in with a secure code to get a code by email, or click Reset password.
- Take a minute to complete your profile. It's used across your courses, communities, and more.
- You'll land on your Dashboard. Pick up where you left off, or look around the sidebar.
What Your Members See in the Portal
Members land on a Dashboard that shows what's happening at a glance:
- Communities, Courses, and Pending invoices: Quick counts at the top, like new posts and courses in progress.
- Pick where you left off: Jump back into the course they were working on.
- Finances: Their invoices, estimates, and contracts.
- Shared files: Files you've shared with them.
- Pinned communities and Ongoing events.

The sidebar groups everything else into three sections:
- Memberships: Communities, Courses, and Events
- Finances: Invoices, Estimates, and Contracts
- Business & Operations: Shared files, Appointments, and Loyalty

Who Needs to Sign Up
Members only need to sign up if they don't already have access to your courses, communities, or affiliate program. Members who already have access can sign in to the portal directly with the login they already use.
Ways to Get Members Into the Portal
Option 1: Have the member sign up themselves
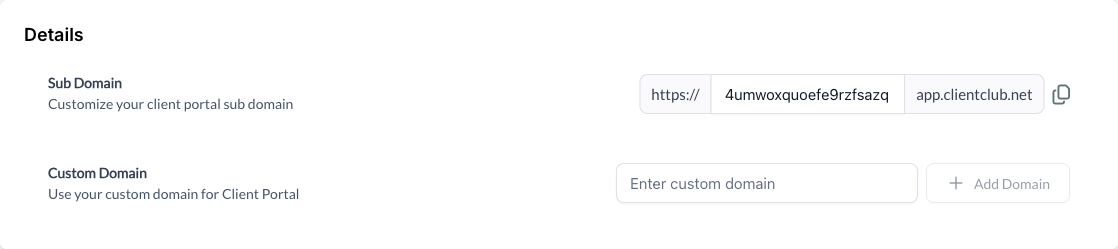
- Go to Memberships > Client Portal > Settings > Domain Setup, copy your portal link, and send it to your member.
- The member opens the link and lands on the Sign in page. Under New here?, they click Sign up.
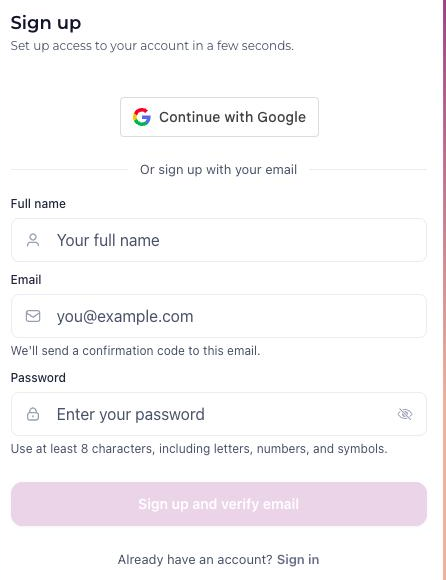
- They enter their Full name, Email, and a Password (at least 8 characters, including letters, numbers, and symbols), then click Sign up and verify email. They can also click Continue with Google instead. The system emails a confirmation code.
- They enter the code to verify their account. Codes expire after 15 minutes, and members should check their spam or junk folder.
- After verifying, they log in with the password they chose.
Note: Verification keeps member accounts secure. Tell members to keep their login details private and not share them.
Option 2: Send a magic link
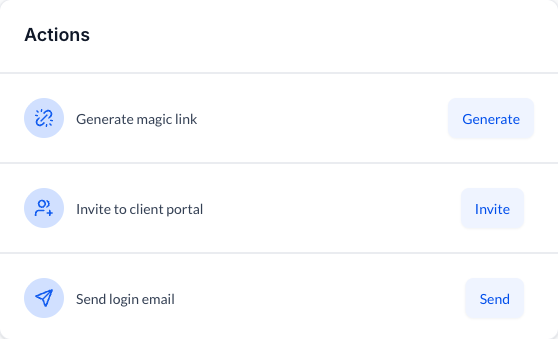
- Go to Memberships > Client Portal > Dashboard. In the Actions box, find Generate magic link and click Generate.
- Choose the magic link type: Contact (a link for a specific customer) or Custom Menu (a link for a custom menu or section, such as courses, communities, or the affiliate section).
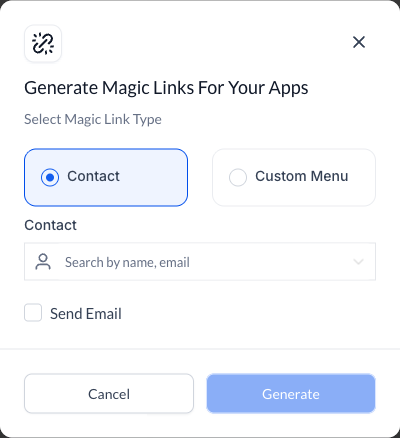
- For Contact, search for the contact by name or email. For Custom Menu, choose the menu.
- Check Send Email if you want to email the link when you create it, or leave it unchecked and copy the link to send it yourself. Then click Generate.
Quick notes:
- You can generate only one magic link for one customer at a time.
- A contact-specific magic link lets that contact sign in without a password. After they click it, they're asked to create a password for future logins.
- Custom menu links can be placed anywhere. Customers without an account follow the sign-up steps above.
The Actions box also has Invite to client portal (the recipient follows the sign-up steps if they have no account) and Send login email (a login email that contains a magic link).
Option 3: Add members with a workflow
Another popular way to enroll students is an automation. In your order fulfillment workflow, add a step that grants access to your course or community:
- Communities: the Grant Community Access action.
- Courses: the Grant Offer Access action.
Once access is granted, the member gets an email with their login details. You can customize the login email for courses. The login email for communities can't be customized right now.
Logging In
Members can sign in three ways from the Sign in page:
- Email and password: Enter them and click Sign in.
- Sign in with a secure code: The member gets a time-limited code by email and enters it to sign in.
- Continue with Google: Sign in with a Google account.
Forgot your password? Click Reset password under the password field.
Multiple accounts on one email: If several accounts share an email address, the portal asks which account to open. Always double-check the account you select so you're looking at the right information.
Profile Details
Members can fill in their profile from the profile menu (their initials in the top right) > Profile Settings. It includes their Full Name, Profile Slug, Title, Company, Website, Bio, a profile photo, and a cover image. Their profile shows across your courses, communities, and more, so it's worth a few minutes.
Moving Between Areas of the Portal
Use the sidebar to move between your courses, communities, finances, files, and more in one click.
FAQs
Q1. Can a member with multiple accounts switch between them?
Yes. If several accounts share one email, the portal asks which account to open. Members can switch between accounts as needed.
Q2. Is it necessary for members to complete their profile details?
Yes. Profile details are used across your courses, communities, and more for a smoother, more personal experience.
Q3. Can members switch between courses, communities, and other areas?
Yes. Members can move between them from the sidebar.
Q4. What if a member forgets their password?
They can click Sign in with a secure code to sign in with a code sent to their email, or click Reset password on the Sign in page.