
Application Funnel Template
We have an application funnel (with automations) already built and available to load into your FG Funnels® account. Get the copy, tech, and design launched on your domain.
TABLE OF CONTENTS
Where To Find The Application Funnel Template
- Log in to your FG Funnels® account.
- From the dashboard view of your account, scroll down the left menu and click on the Request Collection tab.
- Within the Request Collection tab, open the dropdown menu and select FG Collection - Application Funnel Template. Then submit the form to load the template into your account.
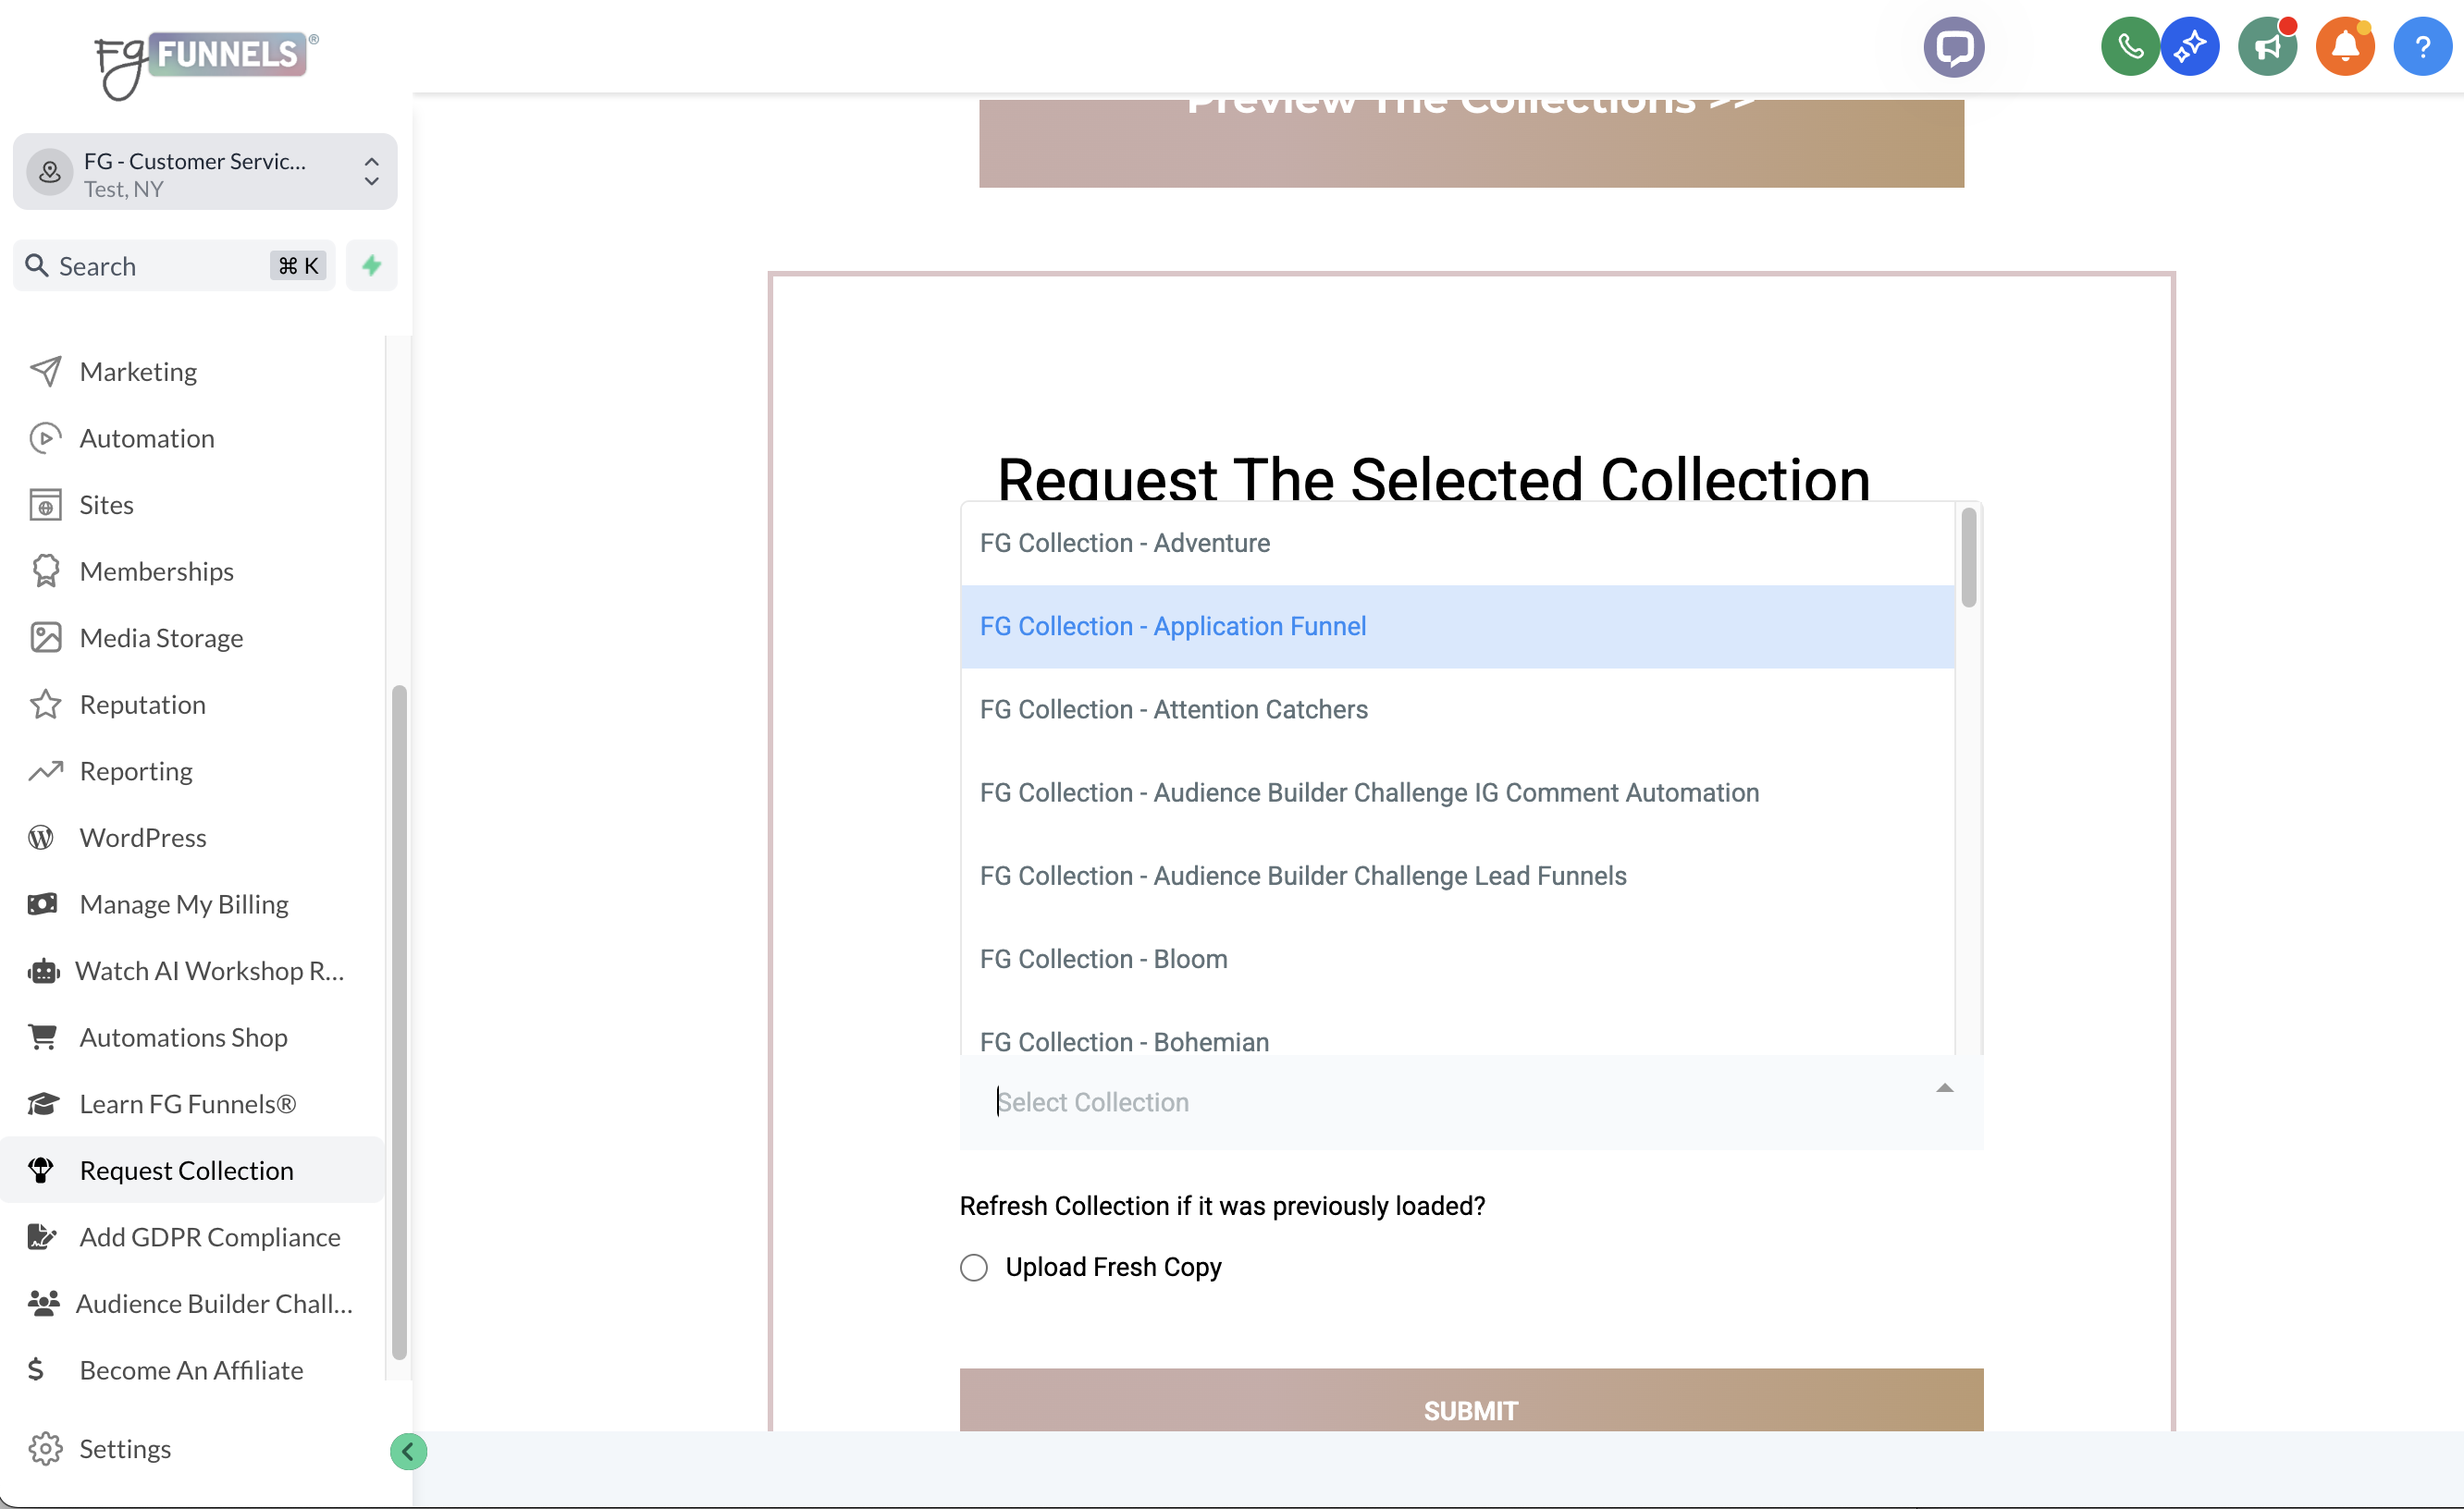
- Within (usually) 5-15 minutes, your template will be loaded into your account.
- Sometimes it can take a bit longer, but if you don't see it after an hour, let us know.
What's Included
- 1 folder of Funnels named - FG Application Funnel Template + Assets
- Which contains the following funnels:
- Share Funnel: Application Funnel Template - CLONE THIS FUNNEL BEFORE USING
- Funnel Assets: Application Funnel Template - DO NOT BUILD IN THIS FUNNEL
- Which contains the following funnels:
- 1 folder of Forms named - FG Application Funnel Template Forms
- Which contains the following forms:
- Share Form: Application Funnel - Sales Page Option 1
- Share Form: Application Funnel - Sales Page Option 2
- Share Form: Application Funnel - Sales Page Option 3
- Which contains the following forms:
- 1 folder of Workflows named - FG Application Funnel Template Workflows
- Which contains the following workflows:
- 01. Application Funnel Opted In - Reminders To Book
- 02. Application Funnel - Intro Call Booked
- 03. Application Funnel - Intro Call Reschedule
- 04. Application Funnel - Follow Up
- 05. Application Funnel - New Client!
- Which contains the following workflows:
- 1 Pipeline
- Application Funnel: [Offer Name] Pipeline
- 2 Trigger Links
- Application Funnel: Link To Pay
- Application Funnel: Link To Book Intro Call
- 1 Contact Custom Field
- What Pressing Problem Can I Help You Solve?
- 4 Tags
- newsletter - opted in
- intro call booked
- [offer name] :: interested
- [offer name] :: purchased
Customizing The Design
Follow along with the tutorials included in the asset funnel (Funnel Assets: Application Funnel Template - DO NOT BUILD IN THIS FUNNEL) that loaded into your account with the application funnel template. There is a page corresponding to each of the three included sales page styles.
Customizing The Automations
- Customize Your Pipeline
- How To Create A Pipeline
- Included Pipeline: Application Funnel: [Offer Name] Pipeline
- You will find this under Opportunities (left menu from the dashboard view), then Pipelines (top menu within Opportunities).
- Click on the pencil icon to the right of the Pipeline name (under Actions) to edit the stage names within the pipeline.
- Customize Your Forms, If Needed
- How To Create A Form
- Customizing Standard Forms in FG Funnels Templates (Opt-In, Application, etc.)
- Included Forms Folder: FG Application Funnel Template Forms
- You will find this under Sites (left menu from the dashboard view), then Forms > Builder (top menu within Sites).
- Includes 3 form options, 1 styled to match each sales page option:
- Share Form: Application Funnel - Sales Page Option 1
- Share Form: Application Funnel - Sales Page Option 2
- Share Form: Application Funnel - Sales Page Option 3
- You can edit these here or from within the page builder on your chosen sales page.
- Editing these can include changing the appearance, editing existing fields on the form, or adding your own fields.
- Customize Tags
- How To Update A Tag
- Included Tags:
- newsletter - opted in
- [offer name] :: interested
- intro call booked
- [offer name] :: purchased
- You can find these under Settings (bottom of the left menu from the dashboard view), then under Tags in the left menu within Settings.
- Edit these by clicking on the pencil icon to the right of the tag. You will want to replace the items in brackets with your offer name (ex. [offer name] :: interested would become: funnel design :: interested)
- Customize Trigger Links
- Trigger Links - Overview
- Included Trigger Links:
- Application Funnel: Link To Book Intro Call
- Application Funnel: Link To Pay
- You can find the included Trigger Links under Marketing in the left menu (from the dashboard view of your account), then Trigger Links in the top menu within Marketing.
- Click the 3 dots to the right of the Trigger Links to edit the Link URLs that they are directing to so they are pointing to your actual links.
- In All 5 Workflows:
- Customize Copy In Emails
- Workflow Action - Send Email
- Click into each Send Email step in the included workflows and update the copy where needed.
- If you want all your emails in a particular workflow to send from the same From Name and From Email, you can leave those fields blank in the Send Email actions and just fill out the one Sender Details section in that workflow's Settings (which is right below the workflow title at the top of the workflow builder).
- Select Assigned Users
- Action - Assign To User
- Click into each Assign To User step in the included workflows and select the user to assign to contacts going through your workflows. This will connect that user's data with the User Name and User Signature fields used in the emails.
- This step is especially important if your unsubscribe link is typically added to your emails through a user signature. If you add your unsubscribe link to emails another way, make sure it is included in these emails, too.
- Make Sure Correct Pipeline/Stages Are Selected
- Trigger - Pipeline Stage Changed
- In each workflow with a Pipeline Stage Change Trigger, make sure the correct pipeline and stage is selected to trigger that particular workflow.
- For example, in the 03. Application Funnel - Intro Call Reschedule Workflow: the stage that should be selected in the trigger is whatever you renamed the [Offer Name] Reschedule stage to (ex. Funnel Design Reschedule). This workflow will trigger when you move a contact's Opportunity card into the Reschedule stage of the selected pipeline, triggering an email asking them to reschedule.
- Action - Create/Update Opportunity
- In each workflow, check that all Create/Update Opportunity Actions have the correct pipeline and stage selected to move a contact to based on the workflow it's in.
- For example, in the 02. Application Funnel - Intro Call Booked Workflow: the stage that should be selected in the action is whatever you have renamed the [Offer Name] Booked Call stage to (ex. Funnel Design Booked Call). This workflow will move a contact into the Book Call stage of the selected pipeline. This allows you to track stage distribution in your dashboard and reporting to gain insights into how your funnel is performing.
- Trigger - Pipeline Stage Changed
- Customize Copy In Emails