
Verify Emails During Contact Import
Verify email addresses as part of the contact import in FG Funnels to help identify invalid addresses before you use them for email communication. You can import contacts and start email verification in one step, then monitor its progress in Bulk Actions. That makes it easier to keep your contact lists clean and improve email deliverability.
In this article
- What Is Email Verification During Contact Import?
- Key Benefits of Email Verification During Contact Import
- How Email Verification Works During Contact Import
- Tracking Email Verification Progress in Bulk Actions
- How to Enable Email Verification During Contact Import
- Frequently Asked Questions
- Related Articles
What Is Email Verification During Contact Import?
Email verification during contact import lets you start email verification when you import contacts into FG Funnels. By checking email addresses as part of the import, you can spot potentially invalid addresses before you use your lists for email campaigns and other communications.
The feature adds an optional verification checkbox to the final step of the contact import. Instead of importing contacts and starting verification as separate tasks, you can do both at once.
Once the import starts, you can follow verification progress in Bulk Actions, where the process shows Processing and Completed statuses.
Important: Email verification helps identify invalid addresses, but it does not guarantee that every email will be delivered to the recipient's inbox.
Note: Email verification is a paid usage feature. For current pricing, see Email Verification with LC Email. Check the cost before you verify a large list.
Key Benefits of Email Verification During Contact Import
Verifying email addresses as contacts enter FG Funnels improves data quality and cuts the effort of preparing lists for email. You catch problems earlier and keep your contact information more reliable.
- Improved email deliverability: Identify invalid email addresses before you use them, helping reduce delivery failures and bounce rates.
- Cleaner contact lists: Find problematic addresses during import to keep better contact data.
- Simplified import process: Start the import and email verification together instead of managing them as separate tasks.
- Reduced manual effort: No need to start a separate verification process after importing.
- Better sender reputation protection: Reduce the risk of sending to invalid addresses that could hurt your sender reputation.
- Easy progress tracking: Monitor verification progress from Bulk Actions using the Processing and Completed statuses.
How Email Verification Works During Contact Import
Email verification during contact import adds an optional verification step to the existing CSV import. The process follows the standard contact import, with one extra option before you start the import.
Email verification checkbox
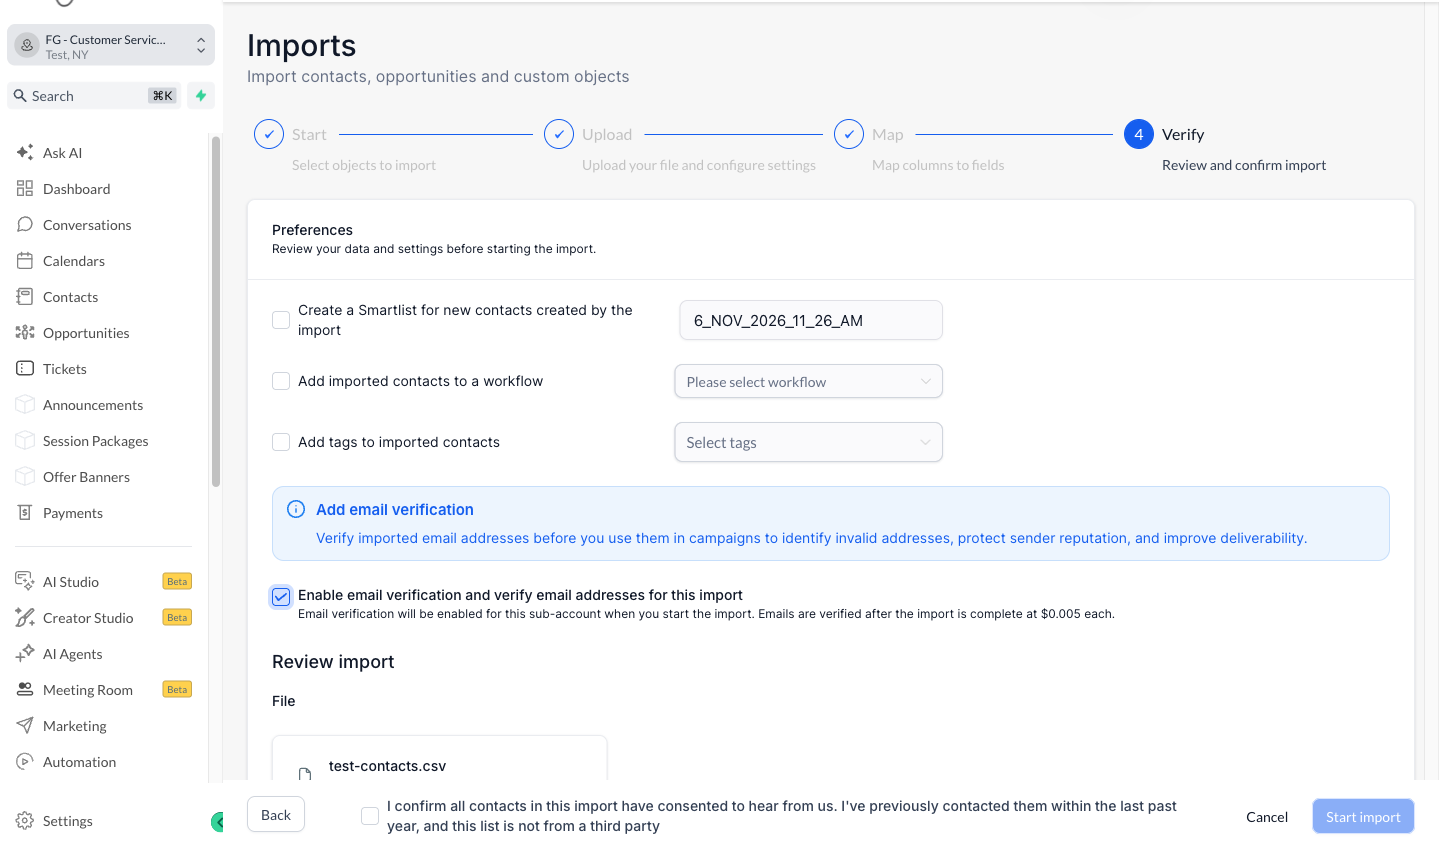
The final step of the contact import, Verify, includes a checkbox for enabling email verification. When it's selected, FG Funnels verifies the imported email addresses after the import is complete.
- The verification option is on the final step of the contact import.
- You choose whether to enable verification before you start the import.
- Email addresses are verified after the import is complete.
- You can monitor progress from Bulk Actions.
Email verification vs. CSV formatting
Email verification and CSV formatting checks serve different purposes. Email verification checks email addresses to help determine whether they appear valid for email communication. For example, an address can have the correct format but still belong to an inactive or nonexistent mailbox. Verification gives you an extra check beyond basic CSV formatting.
For more on preparing your contact data, see How to Import Your Contacts.
Tracking Email Verification Progress in Bulk Actions
Bulk Actions is a central place to monitor contact import operations and their progress. When you enable email verification during import, use Bulk Actions to follow the verification process and see when processing has finished.
Accessing Bulk Actions
After you start a contact import with email verification enabled, go to Contacts → Bulk Actions, then find the action you want to monitor.
The verification process shows these statuses:
| Status | Description |
|---|---|
| Processing | Email verification is currently being processed. |
| Completed | The verification process has finished. |
Reviewing Bulk Action details
Bulk Actions also has general reporting tools for contact import operations. Depending on the action type, you can:
- View the status of a bulk operation.
- Filter actions by status, type, user, or date.
- Select Show Stats to review available job statistics.
- Download available import error logs for troubleshooting.
Note: A Completed status means processing has finished. It does not mean every email address passed verification.
For more information, see Contacts and Bulk Actions - FAQs.
How to Enable Email Verification During Contact Import
Follow these steps to start email verification while you import contacts.
Note: Only users with Admin access can import contacts.
Tip: Tick the verification checkbox every time you bring a list over from another platform.
1. Open the import
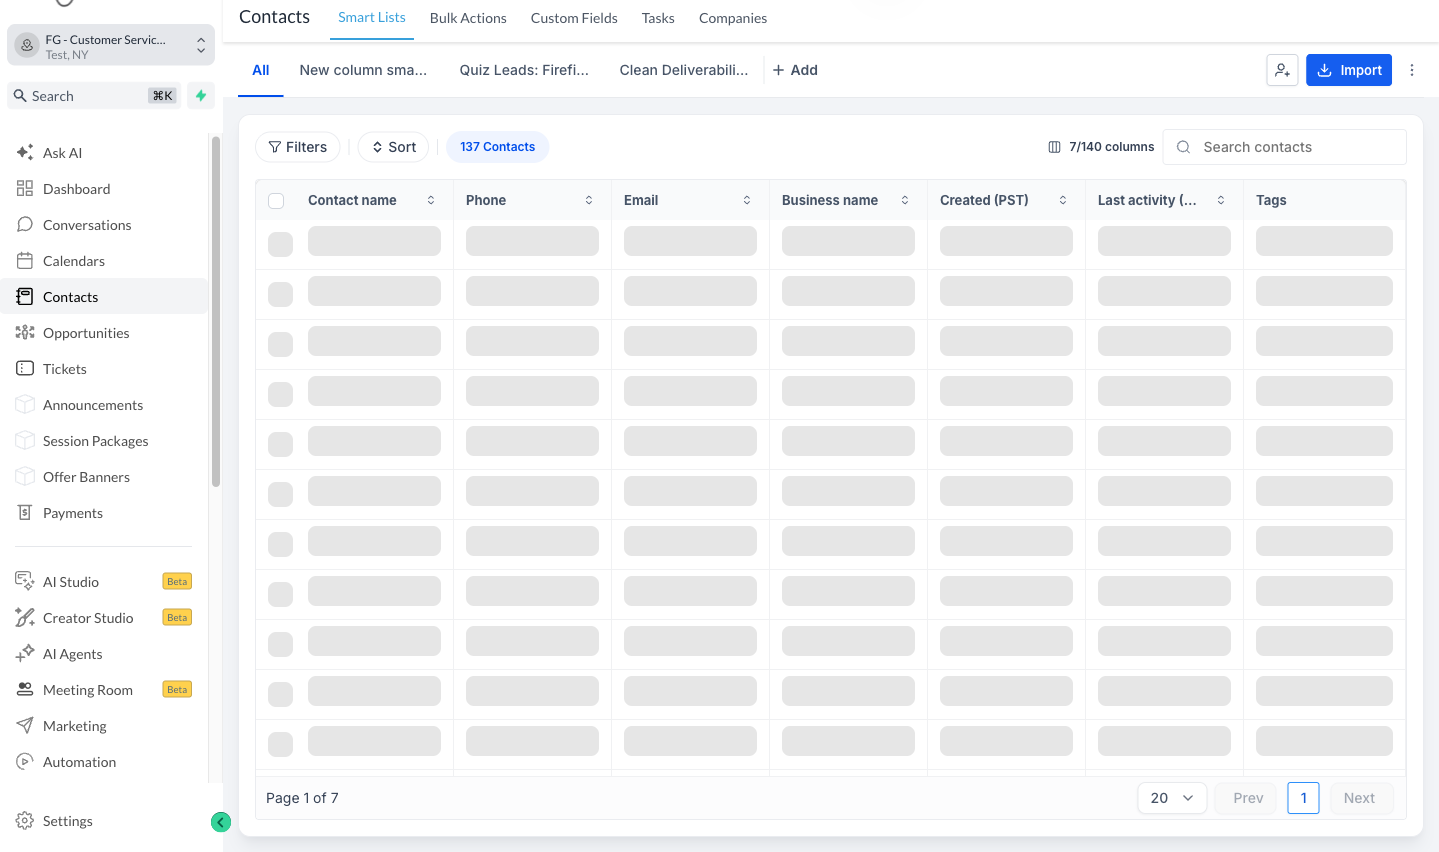
- Log in to your FG Funnels sub-account.
- Select Contacts from the left navigation menu.
- Click Import at the top right.
2. Start a CSV import
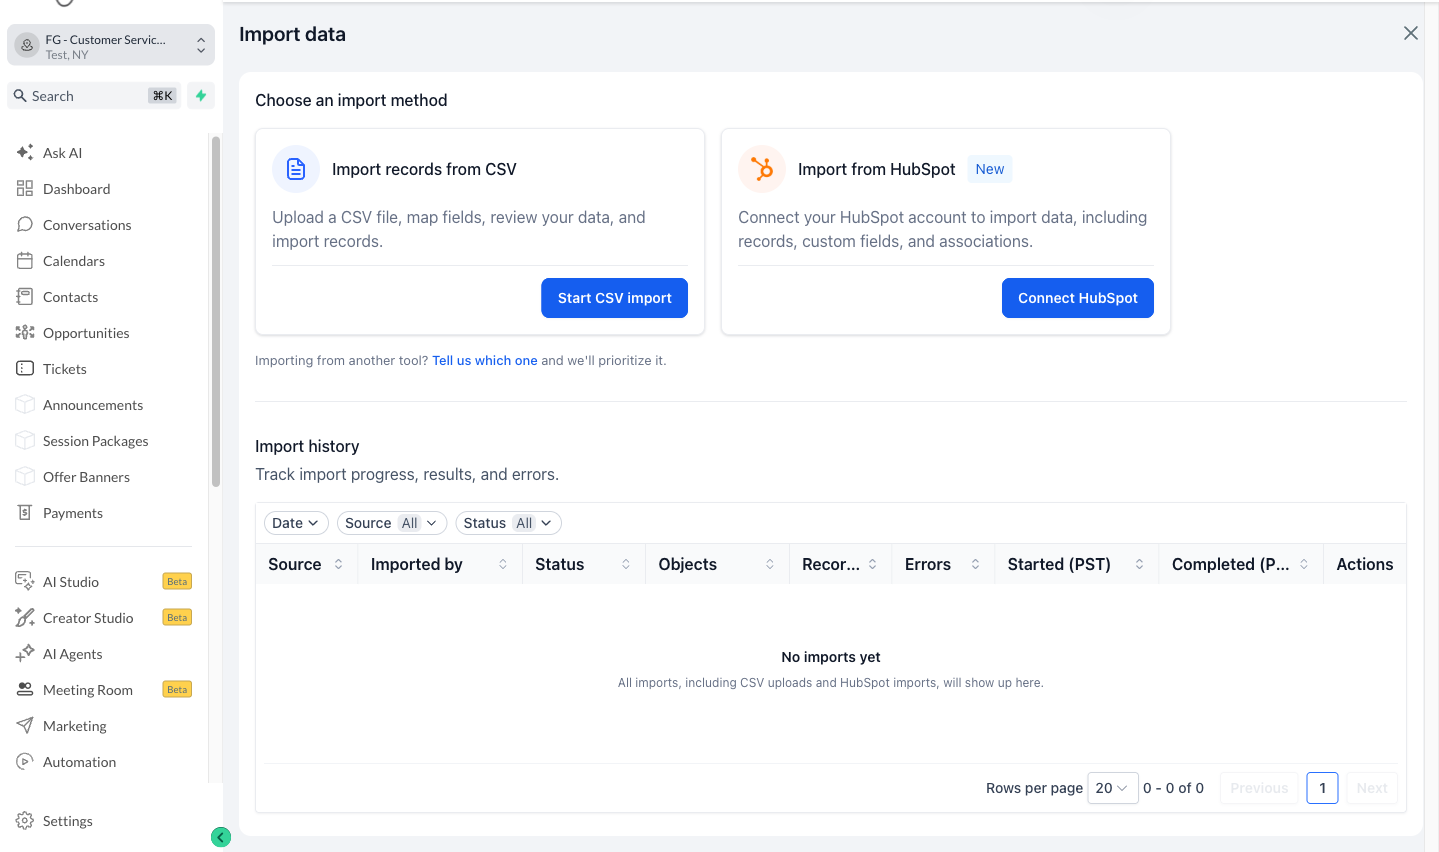
- Under Choose an import method, find Import records from CSV and click Start CSV import.
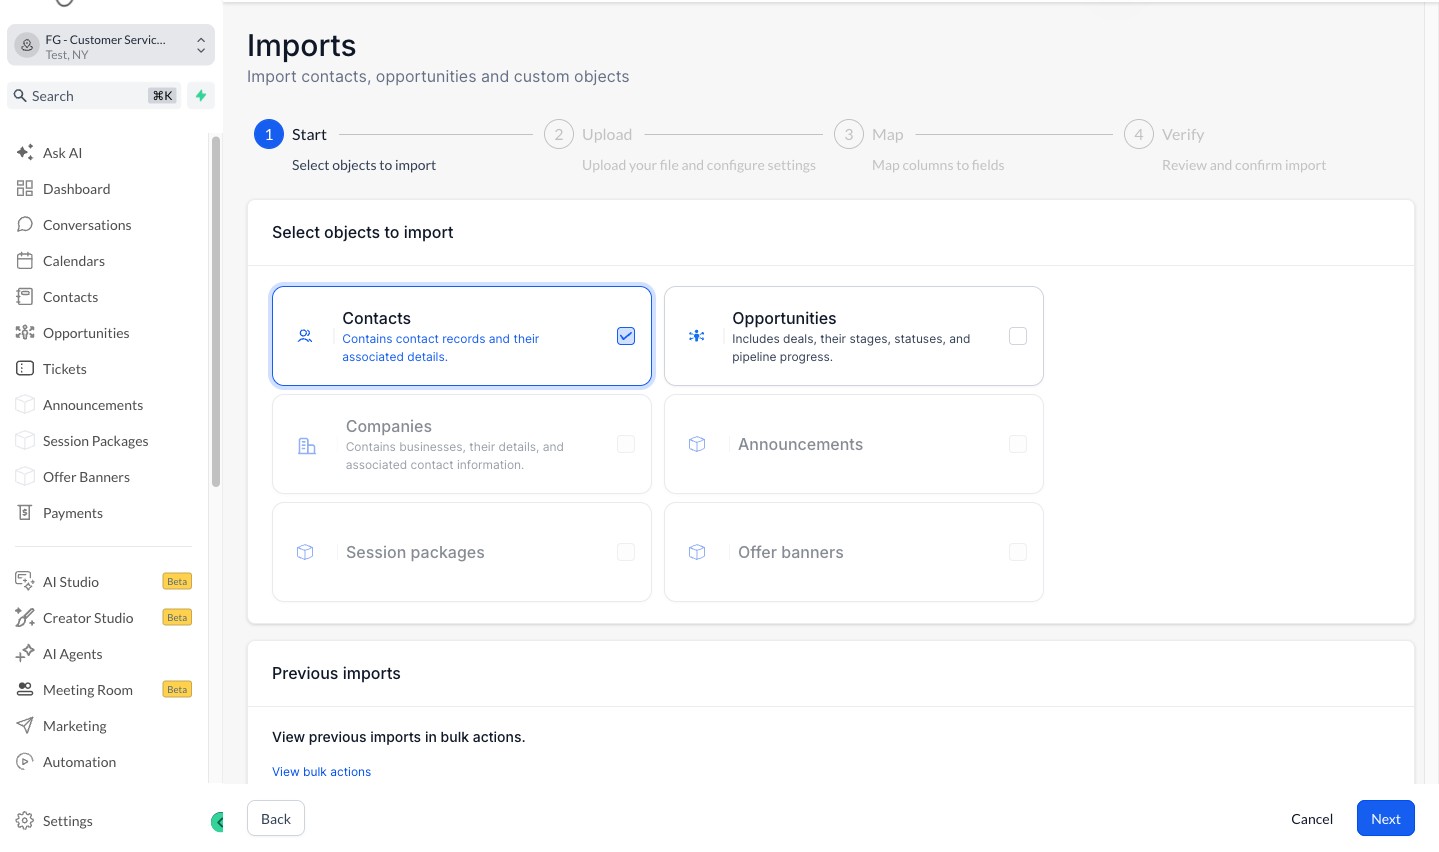
- On the Start step, make sure Contacts is selected, then click Next.
3. Upload your CSV
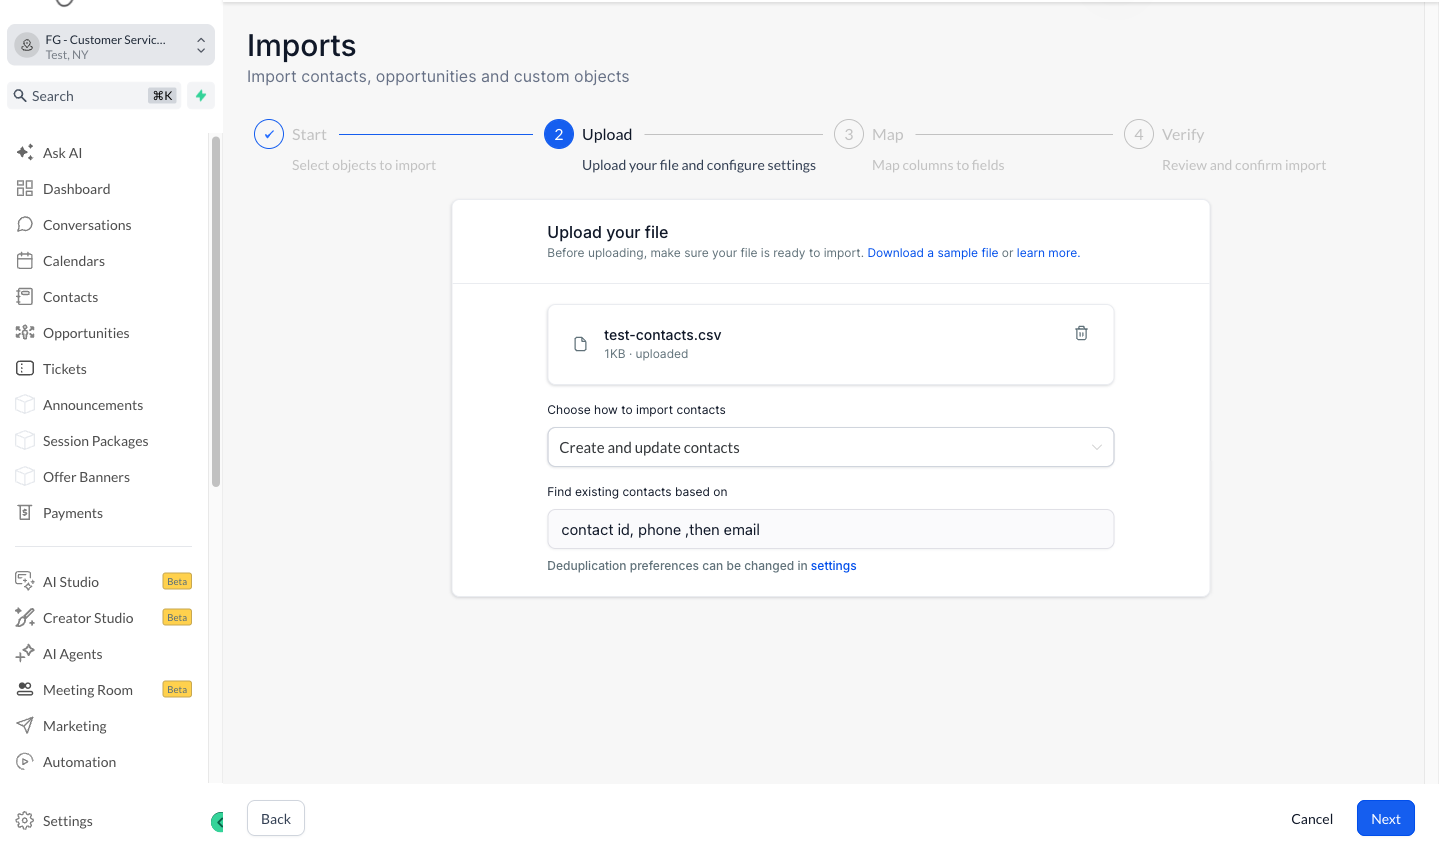
- On the Upload step, click the upload box or drag your CSV file into it.
- Under Choose how to import contacts, choose whether to create new contacts, update existing contacts, or both.
- Review how existing contacts are found under Find existing contacts based on.
- Click Next.
Note: The file must be a CSV under 30 MB. Make sure the Email column contains the right email addresses. For more on preparing your file, see How to Import Your Contacts.
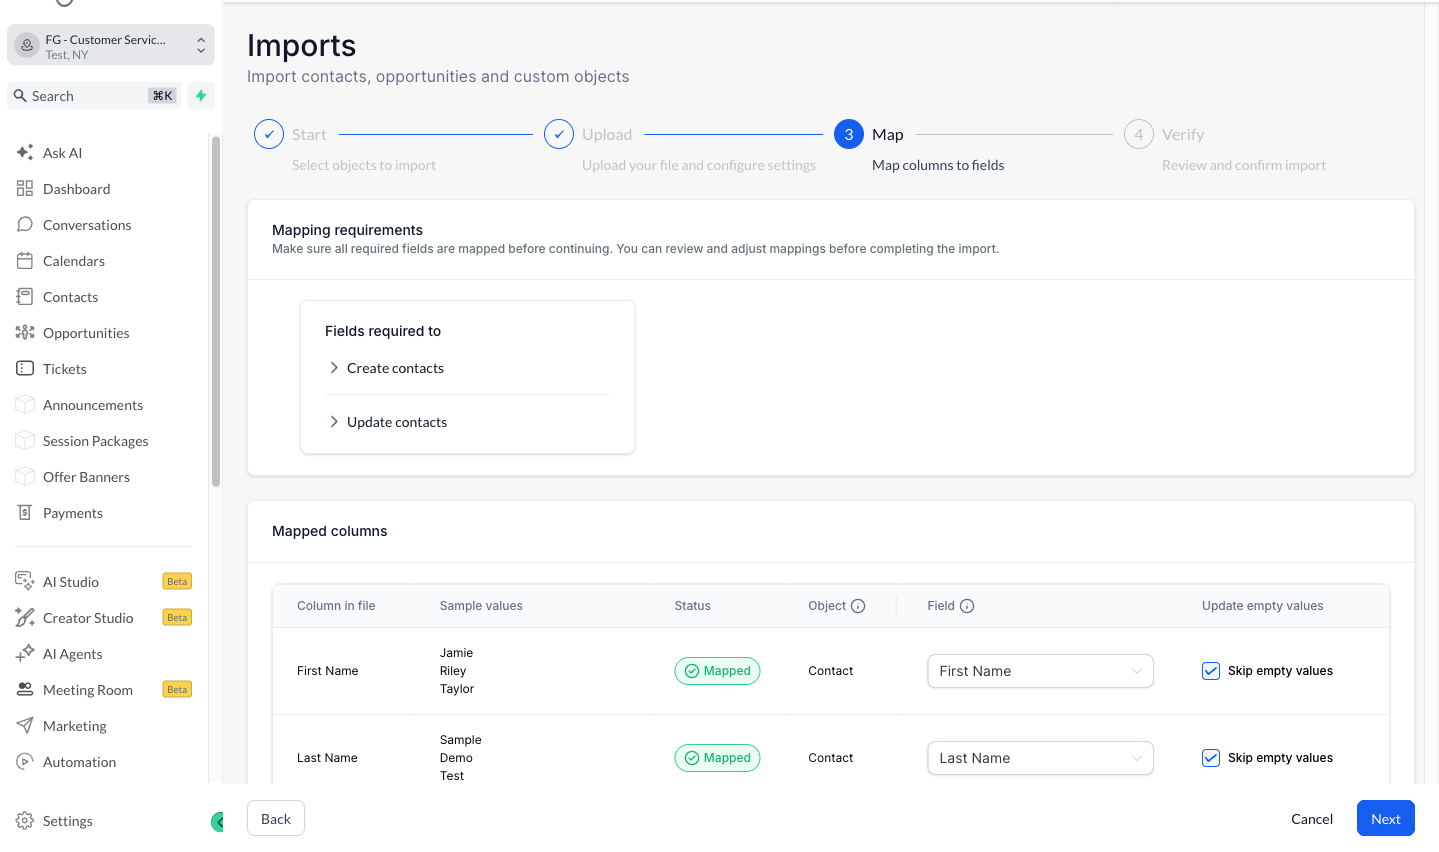
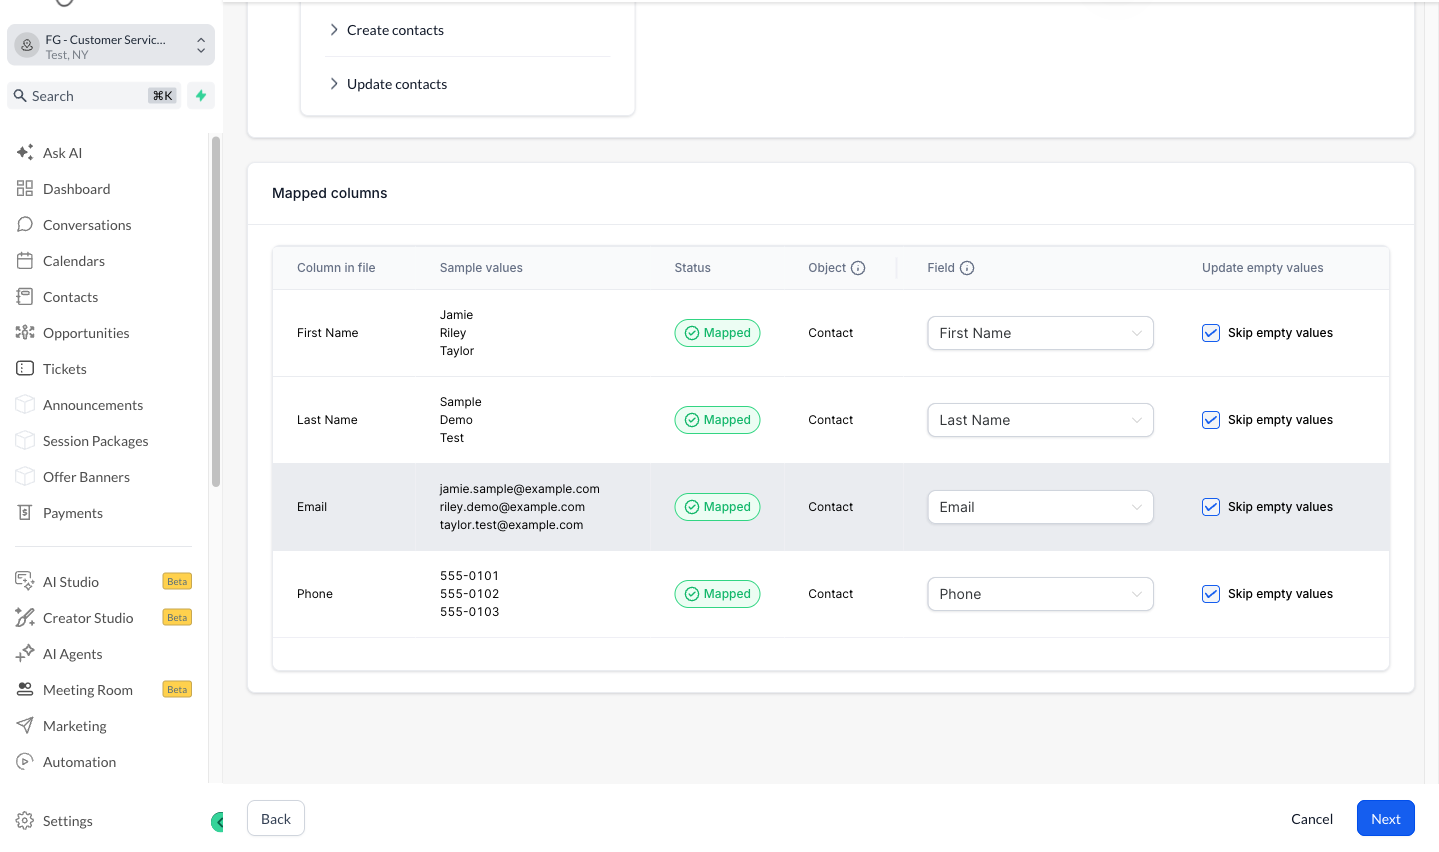
4. Map your contact fields
- On the Map step, review the columns from your CSV. FG Funnels maps matching columns automatically.
- Make sure the column with email addresses is mapped to Email.
- Change any other field mappings as needed.
- Click Next.
5. Turn on email verification
- On the Verify step, review your preferences, such as creating a smart list, adding contacts to a workflow, or adding tags.
- Select Enable email verification and verify email addresses for this import.
Important: Selecting this option also turns on email verification for your sub-account when you start the import. The cost per email is shown under the checkbox. Email addresses are verified after the import is complete.
6. Start the import
- Select the box confirming that your contacts have consented to hear from you.
- Click Start import.
7. Monitor verification progress
- Go to Contacts → Bulk Actions.
- Find the import-related verification action.
- Watch the action until its status changes from Processing to Completed.
- Review any available action details or results.
You can also see your import's progress, results, and errors under Import history when you click Import on the Contacts page.
Important: Completing verification does not guarantee that every verified address will accept email. Keep following email deliverability best practices, including getting appropriate consent before you contact imported contacts.
Frequently Asked Questions
Does email verification guarantee that an email will reach the recipient's inbox?
No. Email verification helps identify potentially invalid addresses, but delivery also depends on factors such as sender reputation, recipient mail server settings, spam filters, and mailbox availability.
Is email verification during contact import the same as verifying before the first email is sent?
No. Import verification checks addresses when you import a list. Automatic verification in Settings > Business Profile verifies each new contact's address before the first email is sent. Selecting email verification during an import also turns on this setting for your sub-account. For details, see Email Verification with LC Email.
I don't see the Import button. Why?
Only users with Admin access can import contacts. Ask your account admin to import the list or to update your permissions.