
Introduction to Workflow Maps
Learn what Workflow Maps shows, where to find it, and how to start exploring your automations.
In this article
What Is Workflow Maps?
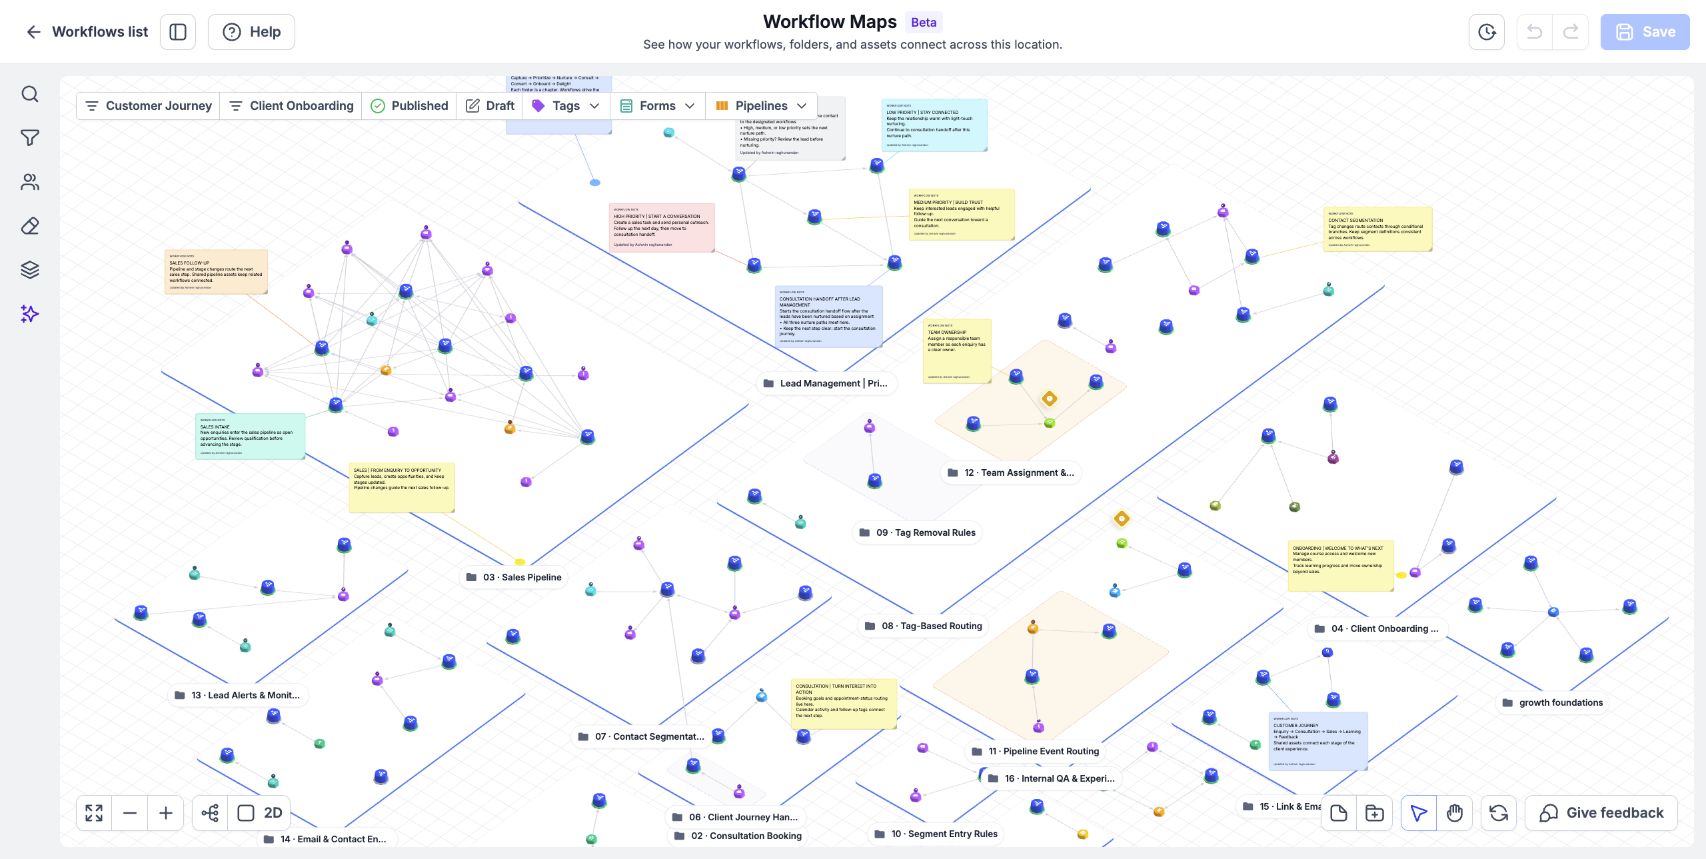
Workflow Maps gives you a visual overview of the workflows in your sub-account and the assets they use. It reads the workflows you've already built and draws their connections automatically.
Workflows appear inside their folders, with assets such as tags, forms, calendars, and pipelines around them. The connections show you what starts a workflow and what the workflow changes.
For example, a form might start a lead intake workflow. That workflow might add a tag, which starts a follow-up workflow. The map helps you follow these relationships before you change any part of the automation.
Where to Find Workflow Maps
1. Open your account
2. Go to Workflows
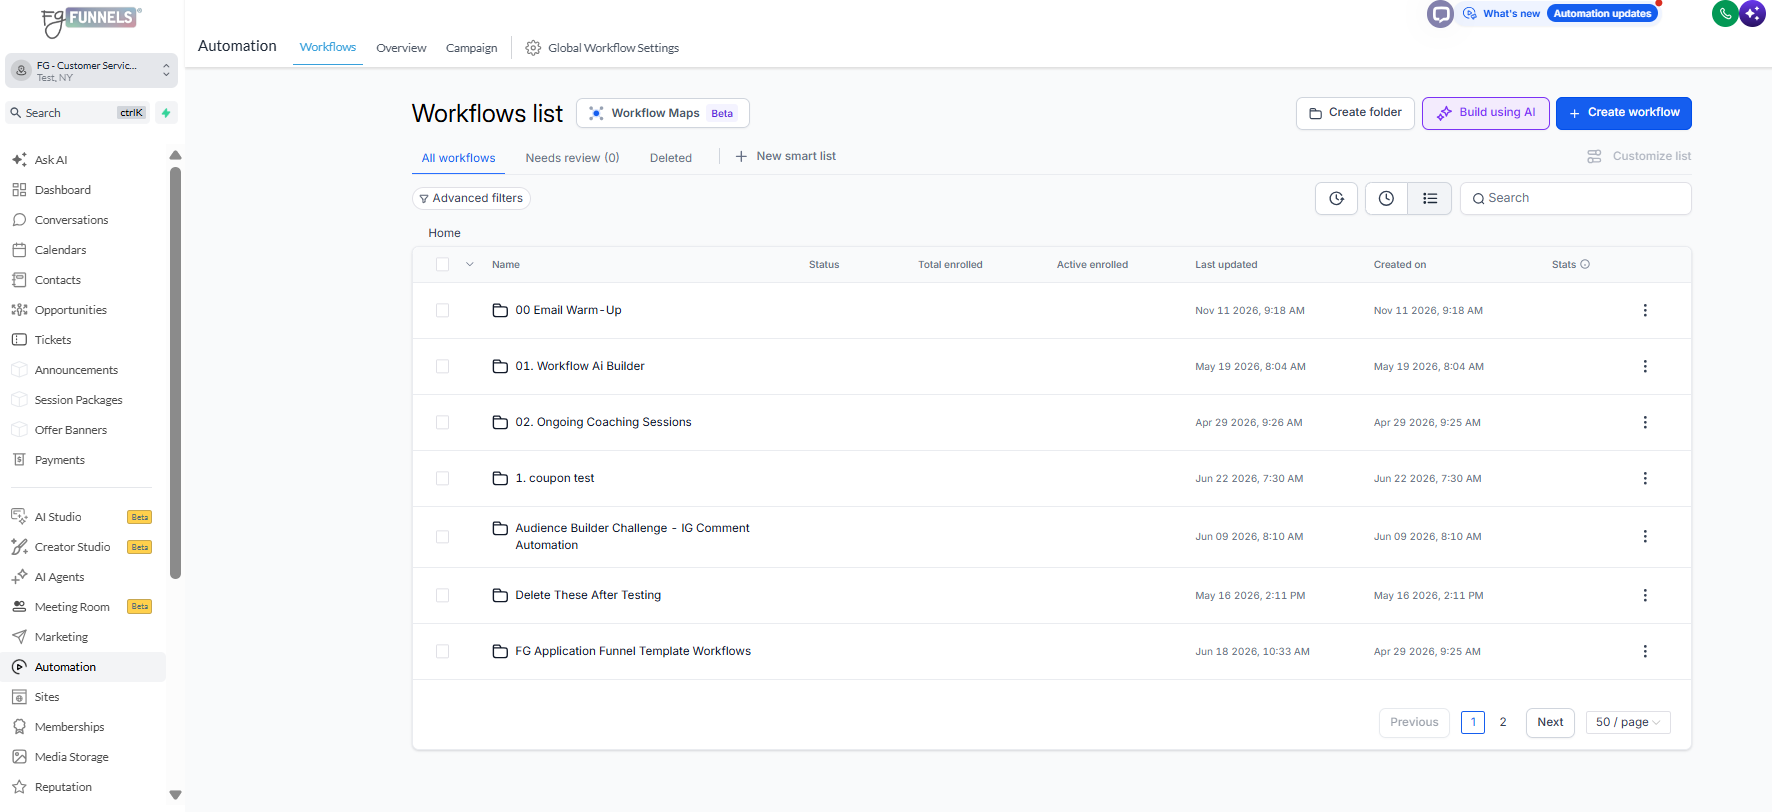
Go to Automation, then Workflows.
3. Open the map
Click Workflow Maps beside the Workflows list title.
If you're already editing a workflow, click Maps in the builder's top bar.
Key Benefits of Using Workflow Maps
- Understand an account: See workflows, folders, and their connections together.
- Check dependencies: Find the workflows that use an asset before you change it.
- Investigate problems: Review workflows with errors and inspect failed executions.
- Explain a contact's journey: Follow the workflows a contact went through.
- Keep the account easy to understand: Organize folders and add notes for your team.
Use Cases for Workflow Maps
- Review an unfamiliar account: Start with the full map, then inspect a workflow and its connected assets.
- Prepare for an asset change: Select a tag or form and review where it's used across folders.
- Investigate an unexpected message: Search for the contact and inspect their workflow history.
- Hand over an automation: Place a note beside a workflow explaining its purpose or dependencies.
What You Can Do From the Map
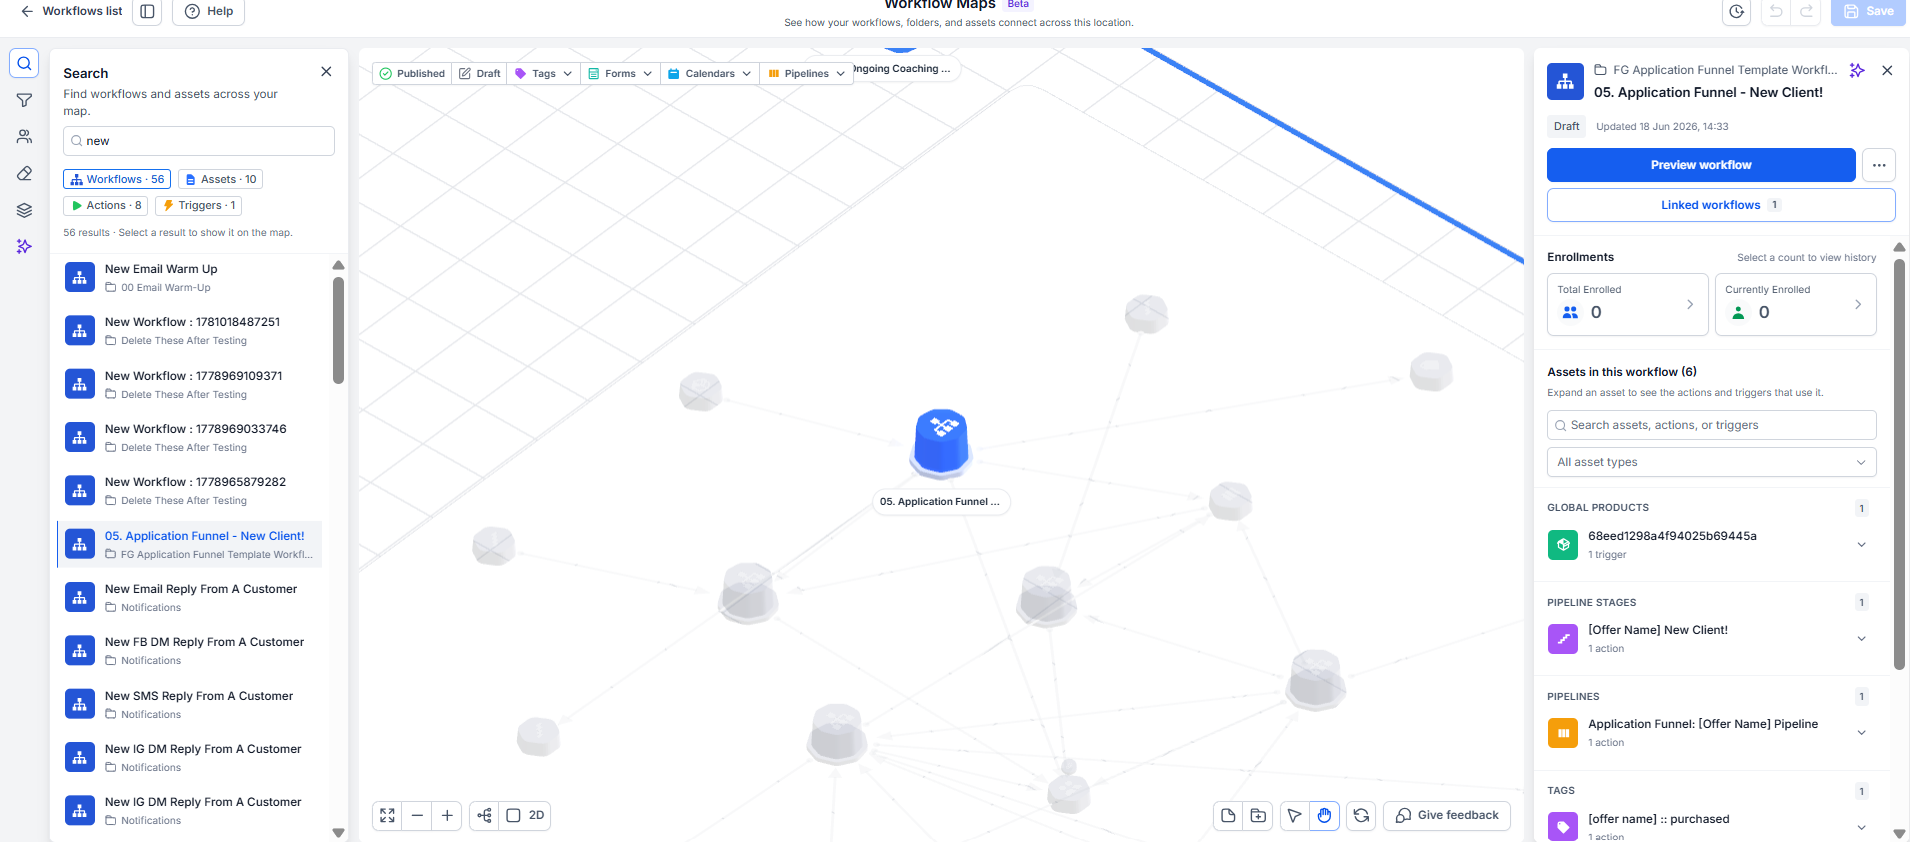
Click a workflow to see its status, when it was last updated, its enrollments, and its connected assets. Preview workflow opens it without leaving the map. Open in builder takes you to the workflow so you can change its steps.
Agency admins can organize the map, rename workflows and folders, change folder colors, and save the layout for everyone in the sub-account.
Wait, if/else, goto, and other internal logic steps are shown in the builder. The map focuses on connections between workflows and assets.
Steps for Getting Started
1. Open Workflow Maps
Open Workflow Maps.
2. Fit the map to your screen
Click Fit to bring the full map into view.
3. Inspect a workflow
Click a workflow to see its details.
4. Check a connected asset
Click a connected asset to see which workflows use it.
5. Inspect a connection
Click a connection to see the triggers or actions behind it. Zoom in first if the map is fully zoomed out.
6. Preview or edit the workflow
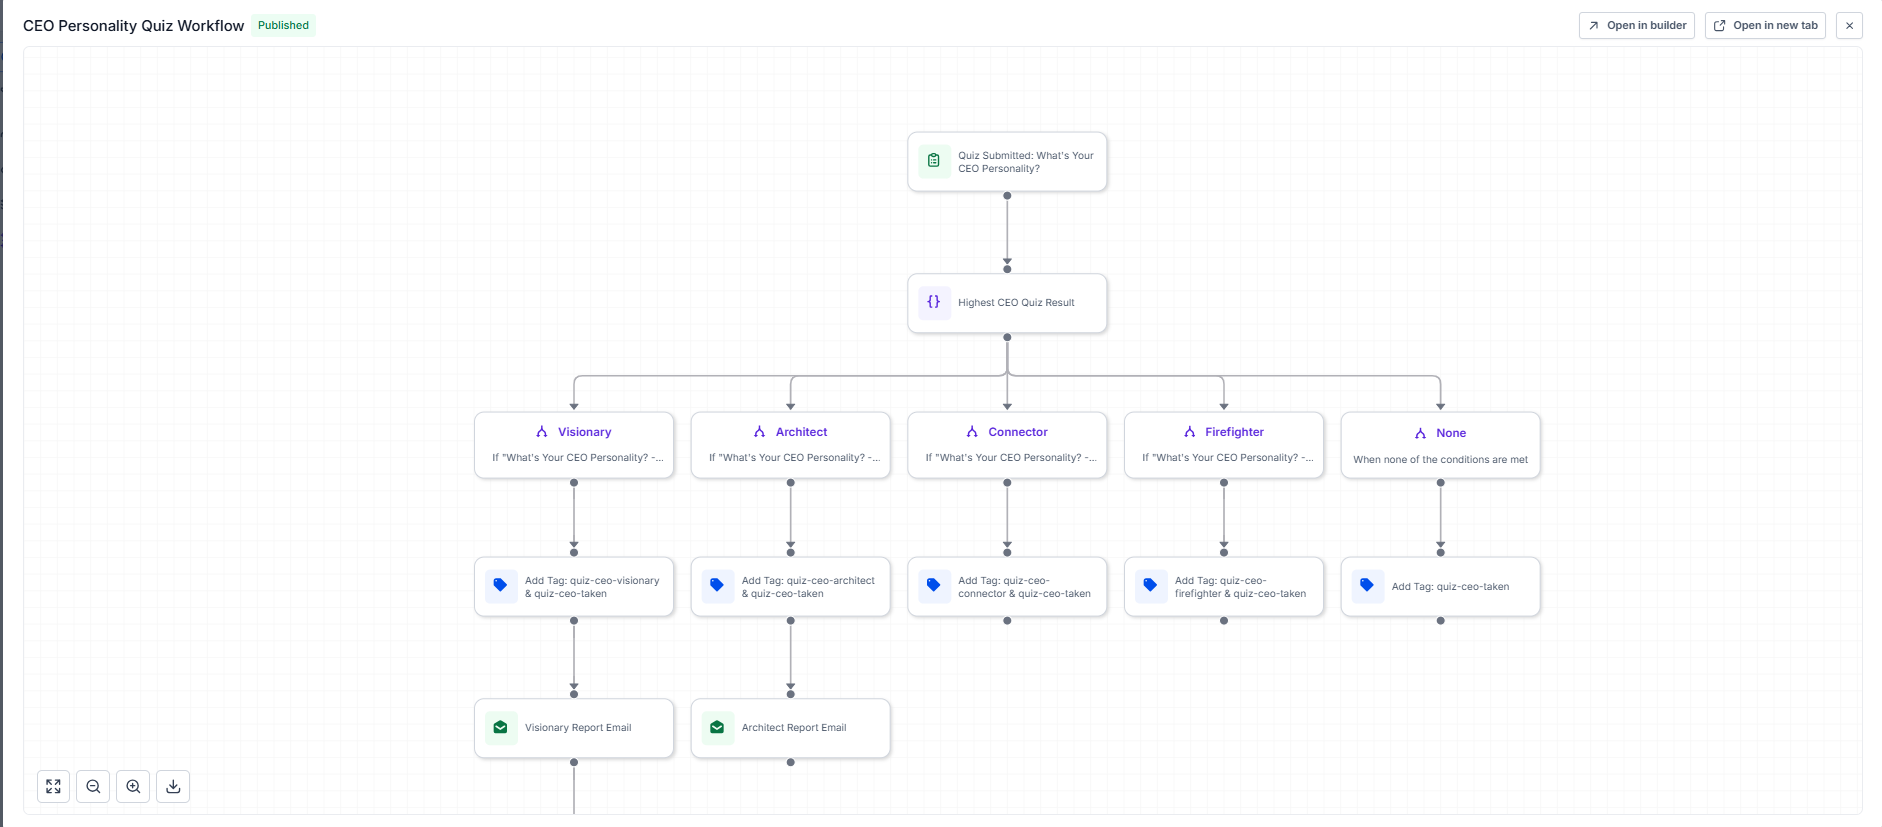
Use Preview workflow to look inside the workflow, or Open in builder to edit its steps.
Frequently Asked Questions
Q: Do I need to create the map manually?
A: No. Workflow Maps reads your existing workflows and their connections.
Q: Is there a separate map for each sub-account?
A: Yes. Each sub-account has its own map.
Q: Can I change workflow steps on the map?
A: Open the workflow in the builder to change its steps. Agency admins can make organizational changes from the map.